
A broken or outdated letterbox lock leaves your mail vulnerable to theft and compromises your home security. Whether you lost your keys, moved into a new house, or need to fix a worn mechanism, learning how to change a letterbox lock is a quick and affordable DIY solution.
This guide walks you through replacing the entire unit or just the internal barrel in under 10 minutes. You will learn precise measurement techniques, essential installation steps, and how to avoid common mistakes that cause installation failures.
Remove the Front Cover Plate to Access Hardware
You must expose the internal components before attempting any removal work. Start by taking off the front cover plate of your letterbox using the correct screwdriver.
Identify Your Screwdriver Type
Check if your letterbox uses flathead or Phillips screws. Select the matching tool to prevent stripping the screw heads during removal. Unscrew all visible fasteners holding the plate in place and store them safely.
Clear the Work Area
Set the cover plate aside in a clean spot where it cannot get lost or scratched. You should now see the lock body, mounting hardware, and the side bolt that secures the mechanism to the frame.
Pro Tip: If screws feel stuck, apply a few drops of penetrating oil and wait a few minutes. For painted screws, gently tap the screwdriver tip with a hammer to break the paint seal.
Loosen the Side Retaining Bolt Safely
Locate the side retaining bolt once the cover plate is removed. This horizontal metal rod or nut runs through the lock body and holds it firmly against the letterbox frame.
Use an Adjustable Spanner
Fit your adjustable spanner onto the bolt head or nut. Turn counter-clockwise to loosen it completely. Some models require removing a small retaining screw first to allow the bolt to slide out freely.
Inspect for Additional Fasteners
Check carefully for any washers or secondary clips that might fall out. If the lock still feels stuck, verify that no hidden tabs or extra screws are holding it in place before pulling harder.
Visual Cue: The lock mechanism should move freely once the bolt is removed. If it remains rigid, double-check your work for missed fasteners.
Extract the Old Lock Mechanism Completely
With all fasteners removed, the old lock is ready for extraction. Pull the entire mechanism gently from the front of the letterbox housing.
Wiggle to Dislodge
Some units fit tightly and may require a slight wiggling motion to come loose. Do not force it if it resists significantly, as this could bend internal tabs or damage the housing.
Decide Between Full or Partial Replacement
If you are replacing the whole unit, set the old lock aside. If you only need to swap the barrel, you can proceed to extract just the internal cylinder without removing the entire housing.
Common Mistake: Forcing the lock out before fully removing all fasteners often damages the letterbox frame. Always confirm everything is loose first.
Measure Keyway Depth and Fit Accurately
Accurate measurements are the most critical step to prevent installation failure. Most standard locks have a keyway depth of 19 mm, but you must verify this for your specific model.
Critical Dimensions to Check
- Keyway Depth: Insert the key into the old lock and measure from the front face to where the key stops.
- Barrel Length and Diameter: Use calipers or a ruler to ensure the new barrel fits the housing constraints.
- Tab Position: Note exactly where the locking tab protrudes, whether on the top, side, or bottom.
- Backplate Dimensions: Measure the spacing between screw holes to ensure the new unit aligns with your letterbox.
Match Your Replacement Part
Compare your measurements directly against product specifications before buying. When in doubt, bring the old lock to a hardware store for a direct side-by-side comparison.
Warning: A mismatched keyway depth or incorrect tab alignment will prevent the new lock from seating properly, even if the key turns smoothly.
Install the New Lock Body Correctly

Insert the new lock mechanism into the vacant space once you have confirmed all measurements. Align the keyway with the front opening of the letterbox and push gently.
Engage the Locking Tab
Ensure the locking tab on the new unit engages with the housing groove. If it resists, rotate the barrel slightly as a half-millimeter adjustment often solves alignment issues.
Secure the Side Bolt
Reinsert the side retaining bolt and tighten it with your adjustable spanner. Ensure it is secure but avoid overtightening, which can warp the mechanism and cause the key to bind.
Pro Tip: Insert the key and turn it while tightening the bolt. If the key sticks, loosen the bolt slightly as the lock may be under too much pressure.
Reattach the Front Cover Plate
Place the front cover plate back over the lock mechanism once the body is secure. Align the screw holes and tighten them firmly with your screwdriver.
Ensure Flush Fitting
Make sure the plate sits completely flush against the letterbox surface. It should not pinch the lock or obstruct the movement of the internal flap or bolt.
Verify Alignment
Check that the keyhole is centered within the plate opening. If the plate looks crooked, loosen the screws and realign it before final tightening.
Check: Test the key immediately after reassembly. If turning feels harder than before, the cover or bolt might be applying unwanted pressure.
Extract the Lock Barrel for Re-keying
Use this method if you only need to change the barrel, such as when re-keying after losing keys. This approach skips full disassembly of the letterbox housing.
Locate the Locking Tab
Find the small protrusion on the side or top of the lock body. This tab keeps the barrel locked inside the housing. Use your thumb or a flathead screwdriver to press and hold this tab outward.
Turn Key to Release Position
Some models require turning the key to the 90-degree position, halfway between locked and unlocked, to release the barrel. Hold the tab while performing this action.
Troubleshooting Tip: If the barrel spins but will not pull out, the key is likely not in the correct position. Return to the halfway turn and try again.
Insert the New Lock Barrel

Take your replacement barrel and identify its locking tab. Align this tab with the corresponding groove in the lock housing before insertion.
Push and Click
Insert the barrel at a slight angle if needed, then push it straight in until it clicks or seats fully. Ensure no part of the barrel sticks out and that it sits flush with the housing face.
Secure the Mechanism
Release the locking tab so it snaps back into place, securing the barrel. If your model uses a locking lever, reinsert it securely into its designated slot.
Visual Check: The keyhole should appear centered and level. If it looks crooked, remove the barrel and realign the tab before trying again.
Reinstall Retaining Components Properly
Replace any washers, nuts, or screws removed during the barrel extraction process. These components ensure the barrel remains stable during operation.
Tighten Without Over-torquing
Tighten the retaining nut with your spanner if your model uses one. The goal is to secure the barrel without restricting the movement of the internal pins or key.
Check for Snap-in Designs
Note that some modern barrels use a snap-in design with no external fasteners. In these cases, a firm push is all that is needed to secure the unit.
Expert Note: Always keep small washers and screws in a magnetic tray to prevent losing them inside the letterbox cavity during reassembly.
Test Lock Operation Thoroughly
Never assume the job is complete immediately after installation. Functional testing prevents future lockouts and ensures your mail remains secure.
Verify Smooth Key Turn
Rotate the key back and forth five to ten times. The movement should be free and smooth without any grinding, sticking, or excessive resistance.
Check Bolt Engagement
Open and close the letterbox flap to verify the locking bolt retracts and extends fully with each turn. The lock must latch properly every time the flap closes.
Pro Tip: Spray a small amount of dry graphite lubricant into the keyway if the mechanism feels stiff. Avoid oil-based sprays as they attract dust and gum up over time.
Fix Common Installation Issues
Even careful work can encounter problems. Here are solutions for frequent issues encountered when changing a letterbox lock.
No Key Turn After Installation
This usually indicates a misaligned barrel tab or an over-tightened side bolt. Loosen the side bolt slightly and reseat the barrel to ensure the tab clicks into the groove.
Barrel Won’t Insert
If the barrel refuses to go in, the tab is likely not aligned with the housing groove. Rotate the barrel 90 degrees and try again, as some models require a specific orientation.
Lock Feels Loose
A loose feeling often means a missing washer or a loose retaining nut. Reopen the assembly and inspect all fasteners, replacing any missing parts immediately.
Warning: Never force the key if it does not turn easily. This can shear internal pins or permanently damage the new mechanism.
Upgrade Security and Privacy Features
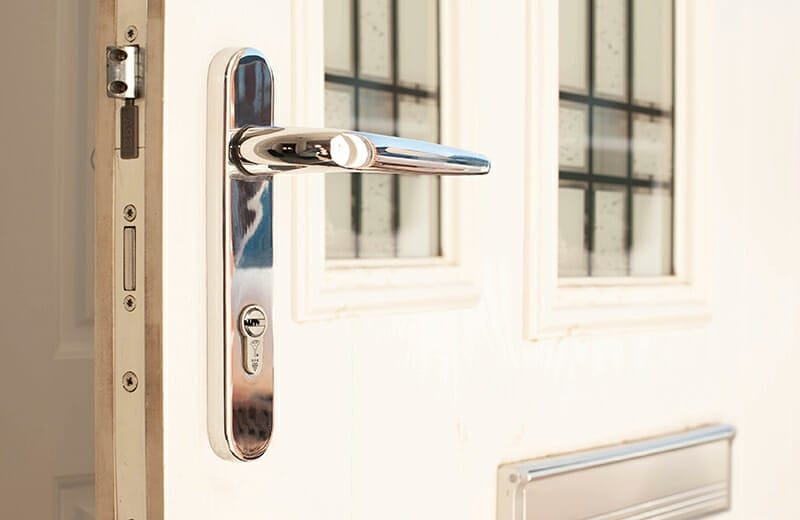
Replacing your letterbox lock offers significant security benefits beyond simple repair. It is a smart upgrade for any homeowner concerned about privacy.
Prevent Mail Theft
A sturdy, modern lock deters tampering and keeps your personal correspondence safe from prying eyes. This is especially important for packages that fit through the slot.
Ensure Total Privacy
When moving into a new property, old keys may still exist in circulation. A new lock guarantees that only you and your family have access to the mailbox.
Strategic Move: Consider upgrading to a 5-lever mortise lock or a TS007 3-star rated barrel for enhanced resistance to picking and snapping attempts.
Extend Lock Lifespan with Maintenance
A well-installed lock can last for many years with minimal care and regular attention. Proper maintenance keeps the mechanism functioning smoothly.
Clean Annually
Wipe the keyway and cover plate once a year to remove dust, grime, and debris. This prevents buildup that can interfere with the locking mechanism.
Lubricate Sparingly
Apply dry graphite lubricant every 6 to 12 months if the key turn becomes stiff. Avoid heavy oils that attract dirt and cause the lock to jam.
Pro Tip: Keep a spare key in a secure location, such as a locked drawer or with a trusted neighbor, to avoid being locked out in an emergency.
Final Checks Before Completion
Perform a final inspection before considering the job done. Confirm the lock operates smoothly with the key and that the front plate is secure.
Double-Check All Fasteners
Ensure all screws and bolts are tightened but not over-torqued. The letterbox flap should close and latch automatically without manual intervention.
Celebrate Your Success
You have successfully improved your home security and saved money on professional services. The entire process typically takes under 15 minutes to complete.
You’re Done: Your mail is now secure, and you have gained peace of mind through this simple yet impactful home maintenance task.
Frequently Asked Questions About Changing Letterbox Locks
How long does it take to change a letterbox lock?
Most people can complete the entire process in under 10 to 15 minutes. The time depends on whether you are replacing the full unit or just the internal barrel.
Do I need special tools to change the lock?
You only need basic tools like an adjustable spanner and a flathead or Phillips screwdriver. These are common household items required for removing fasteners.
Can I change just the barrel instead of the whole lock?
Yes, you can often replace just the internal barrel if the housing is intact. This is ideal for re-keying after losing keys or moving into a new home.
What happens if the new lock does not fit?
If the lock does not fit, your measurements for keyway depth or barrel diameter are likely incorrect. Re-measure the old unit and compare it to the new product specs.
How do I know if my letterbox lock is broken?
Signs include a key that will not turn, a bolt that does not retract fully, or a mechanism that feels loose. Rust and difficulty turning are also common indicators.
Is it difficult to change a letterbox lock myself?
No, it is a straightforward DIY task that requires no specialist skills. Following the correct steps and measurements ensures a successful installation for most homeowners.
Key Takeaways for Changing Your Letterbox Lock
Changing a letterbox lock is a simple, cost-effective way to boost your home security and protect your privacy. By measuring your keyway depth accurately and aligning the locking tab correctly, you can avoid common installation errors. Whether you replace the full unit or just the barrel, this quick upgrade ensures your mail remains safe from theft and unauthorized access.
Take action today by checking your current lock condition and gathering the necessary tools. With the right replacement part and these clear steps, you can complete the job in minutes and enjoy long-term peace of mind.



