
A stuck drawer or lost key leaves your sensitive documents vulnerable to unauthorized access. Learning how to change a file cabinet lock restores security instantly without expensive service calls. This guide details two proven methods: replacing the entire mechanism or swapping just the core. You will discover how to remove drawers safely, install new cylinders, and rekey interchangeable systems in minutes. Follow these steps to secure your office furniture efficiently.
Remove the Top Drawer for Lock Access
Accessing the internal lock housing requires complete removal of the top drawer. This step exposes the cabinet frame where the lock mechanism resides.
Disengage Drawer Stops Safely
You must lift the drawer correctly to avoid damaging the cradle rails.
- Empty the drawer completely to reduce weight and prevent items from falling.
- Open the drawer fully until it hits the internal stop mechanism.
- Lift the front edge upward about 2.5 inches to clear the stops from the rails.
- Slide the drawer straight out and place it on a stable surface nearby.
Locate the Internal Lock Cavity
With the drawer removed, look inside the upper right corner of the cabinet frame. You will see the back of the lock cylinder protruding through a knockout hole. This area is your workspace for removing the old unit or installing a new one. Ensure you have clear visibility before proceeding with any tools.
Replace a Broken File Cabinet Lock
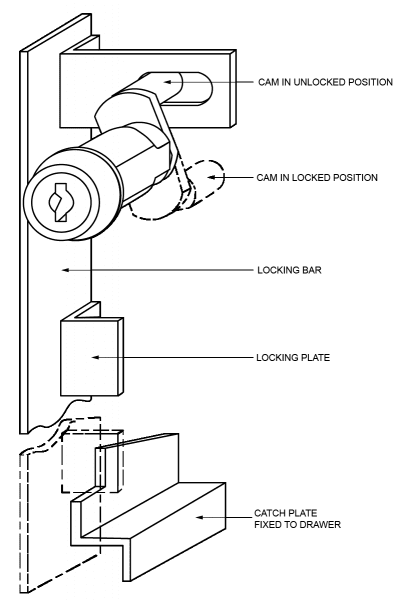
Full replacement is necessary when the mechanism is damaged or missing entirely. This process gives you a brand-new locking system with fresh keys.
Extract the Old Lock Cylinder
Removing the existing unit requires accessing the retaining hardware from inside the cabinet.
- Ensure the lock is unlocked so the bolt retracts fully.
- Reach inside the cabinet to find the clip or nut holding the cylinder.
- Remove the retaining clip or unscrew the nut securing the unit to the wall.
- Pull the cylinder straight out through the knockout hole from either side.
Keep all removed hardware organized in case you need it for future reference.
Prepare the Frame for New Installation
Proper fitment prevents wobbling and ensures long-term durability of your new lock.
- Inspect the knockout hole in the upper right interior corner for damage.
- Compare hole size against the diameter of your new lock cylinder.
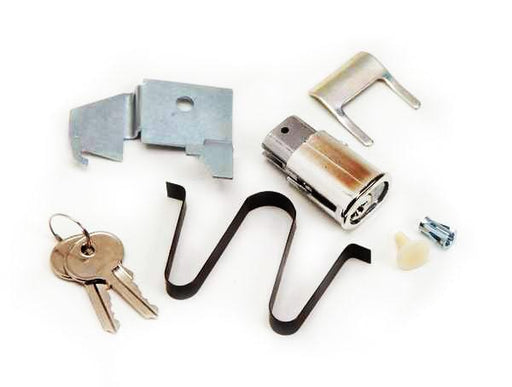
- Install a hole spacer if the opening is too large for the new unit.
Use the metal or plastic ring included in most kits to fill gaps. A snug fit guarantees smooth operation.
Install and Secure the New Cylinder
Correct alignment is critical for the locking bolt to engage properly with the linkage.
- Insert the new cylinder from the outside with the bolt facing upward.
- Turn the key 90 degrees to align internal components for the retaining clip.
- Slide the retaining clip over the cylinder body from the inside.
- Press firmly until the clip snaps into the groove on the cylinder.
Hold the cylinder steady during this step to maintain alignment while securing it.
Connect the Linkage Mechanism
The linkage bar connects the top lock to lower drawers so one key secures the whole unit.
- Insert the pointed end of the linkage bar into the hole on the lock bolt.
- Pivot the bar downward to align the square end with the sidewall slot.
- Bend the square end slightly upward using a screwdriver to create tension.
Pro Tip: Test-fit the linkage outside the cabinet first to understand the movement before final assembly.
Test Lock Functionality Across All Drawers
Verify your work before considering the job complete to ensure total security.
- Reinstall the top drawer by sliding it back into the cradle and lowering it.
- Turn the key to lock and watch for linkage movement on all levels.
- Attempt to open each drawer to confirm none move when locked.
- Unlock and open smoothly to ensure no resistance occurs during operation.
If any drawer sticks, revisit the linkage alignment or check bolt positioning immediately.
Rekey Interchangeable Core Locks
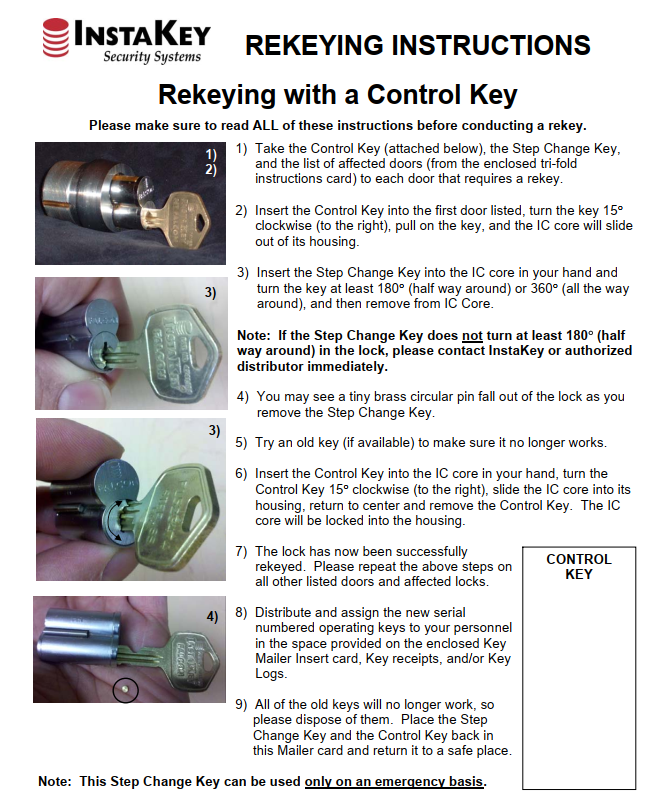
Swapping the core is faster than full replacement and ideal for security updates after employee departures. This method works on IC systems common in commercial offices.
Gather Required Tools and Keys
You need specific items to perform a core swap successfully without damage.
- Current operating key for the existing lock.
- Core removal key (also called a pull or control key).
- New pre-keyed lock core matching your master key system.
The core removal key is a specialized tool not used for daily locking operations.
Position Lock for Core Extraction
Correct positioning determines whether the core releases easily or stays stuck.
- Turn the lock to unlocked using the standard operating key.
- Remove the standard key from the cylinder completely.
Warning: Some models require the locked position for removal. If the core does not release, try turning it to locked and reinserting the removal key.
Extract Old Core and Install New One
Precision prevents damage to the internal housing during this delicate process.
- Insert the removal key fully to disengage the internal retaining pin.
- Pull the old core straight out without angling or twisting the unit.
- Insert the removal key into the new core to align its internal pins.
- Slide the new core into the housing while holding it firmly in place.
- Withdraw the removal key to engage the retaining pins and lock it in.
The new core should stay secure without any tools once the key is removed.
Verify Operation and Security
Confirm the new core functions correctly with your new set of keys.
- Insert the new operating key and turn to lock and unlock.
- Check all drawers to ensure linkage moves and every drawer secures.
- Listen for smooth motion without grinding or sticking sounds.
A successful swap restores full function using only the removal key and new core.
Identify Your Lock Type First
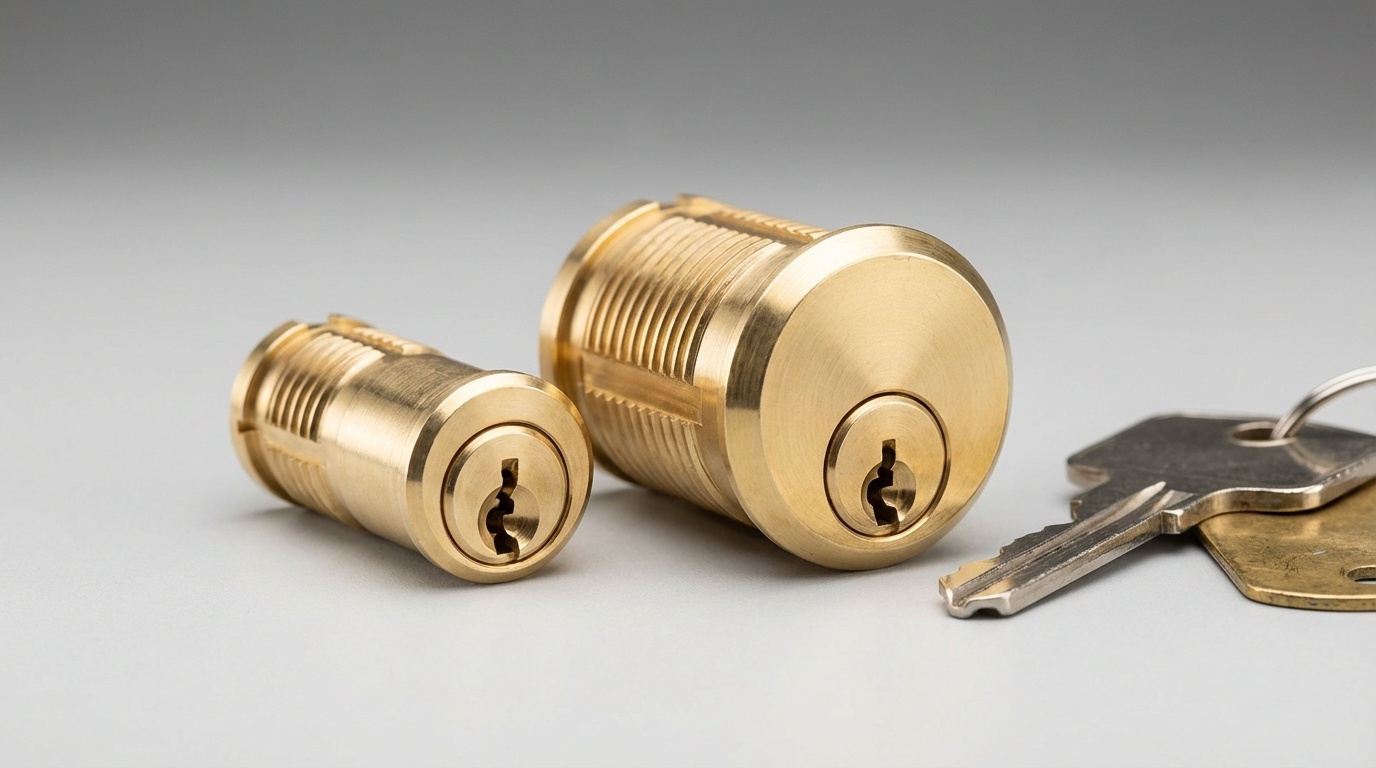
Choosing the correct method depends entirely on your specific lock model and security needs.
Standard Turn-Style Locks
These are found on most basic home and office file cabinets. They require full replacement when worn or damaged since they lack extraction features. Use the full replacement method if you see a rotating knob or standard cylinder.
Interchangeable Core Systems
These feature a recessed design with no visible screws on the face. They allow tool-free core swaps using a control key for rapid security changes. Facilities often use these for easy management of multiple keys.
Universal Replacement Kits
These kits include multiple hole spacers and adjustable linkages for various brands. They are ideal if you manage a mixed-office environment with different cabinet models. Always test fit the cylinder and linkage before final installation.
Troubleshoot Common Lock Issues
Even careful installations can encounter problems that require simple fixes.
Lock Feels Loose or Wobbly
Cause: The knockout hole is larger than the new cylinder.
Fix: Use the hole spacer from your kit. Press it into the hole before inserting the cylinder to eliminate play.
Linkage Disconnects When Opening Drawers
Cause: The square end of the linkage is not bent upward.
Fix: Use pliers to bend the square tip slightly up. This creates the tension needed to catch the sidewall slot.
Core Won’t Come Out
Cause: The lock is in the wrong position for your specific model.
Fix: Reinsert the removal key and try both locked and unlocked positions. Do not force it if it remains stuck.
Lock Turns But Drawers Don’t Engage
Cause: The linkage is misaligned or the bolt is facing down.
Fix: Recheck bolt orientation during installation. The locking arm must point upward to engage properly.
Prevent Future Lock Problems
Maintenance habits keep your filing system secure and functional for years.
Store the Core Removal Key Securely
This key allows anyone to rekey your cabinet instantly. Keep it separate from regular operating keys and assign custody to a facility manager. Never leave it taped near the cabinet or in an unlocked drawer.
Lubricate Periodically
Apply dry graphite lubricant if the key turns stiffly. Avoid oil-based products that attract dust. Insert the key, spray lightly, and work it back and forth to extend core life.
Verify Compatibility Before Buying
Not all locks fit all cabinets universally. Match hole size, bolt length, and linkage type before purchasing. Use universal kits if you are managing multiple cabinet brands to ensure proper fit.
When to Call a Professional
Some situations require expert intervention to avoid permanent damage. Seek help if you have no access to a core removal key and the lock is stuck. Contact a locksmith if the housing is damaged from improper extraction attempts. High-security environments with complex master key systems also benefit from professional installation.
Frequently Asked Questions About Changing File Cabinet Locks
Can I change a file cabinet lock without the original key?
If you have the core removal key, you can swap the core even without the operating key. If you lack both keys, you may need to drill out the lock or call a locksmith to avoid damaging the cabinet frame.
How long does it take to replace a file cabinet lock?
A full lock replacement typically takes 10 to 15 minutes including drawer removal. Swapping an interchangeable core takes under 5 minutes if you have the correct removal key and new core ready.
Do all file cabinets use the same lock size?
No, but many use standard knockout holes in the upper right corner. Universal replacement kits often include spacers to fit various hole sizes. Always check manufacturer specs before buying a replacement.
What is the difference between a core swap and full replacement?
A core swap only changes the internal key mechanism in interchangeable systems. Full replacement removes the entire cylinder and housing. Choose swapping for security updates and replacement for broken hardware.
Where is the lock located inside a file cabinet?
The lock mechanism is located in the upper right corner of the cabinet frame interior. You must remove the top drawer to access the back of the cylinder and the retaining clip.
Key Takeaways for Changing Your File Cabinet Lock

Securing your office files is simple when you know how to change a file cabinet lock correctly. Whether you replace the entire unit or swap an interchangeable core, proper alignment and tool usage are essential for success. Always test every drawer after installation to ensure total security.
Take action today by identifying your lock type and gathering the necessary tools. With these steps, you can restore safety to your filing system in minutes without professional help.



