
Is your Yale smart lock ignoring commands or did you just move into a new home? Learning how to reset a Yale lock is the fastest way to clear old codes and fix unresponsive hardware. This process wipes all user data and returns the device to its factory state for a fresh start.
You will learn specific steps for both Nest × Yale and XCL models to restore full function. Our guide covers battery removal, button sequences, and re-pairing with the Nest app securely.
Execute Factory Reset on Standard Nest × Yale Lock

This procedure applies to the primary Nest × Yale collaboration models found in most homes. You must access a small physical button hidden within the battery compartment to begin.
Remove Battery Cover and Power Source
Use the included tool or a thumbtack to pry open the battery cover on the interior unit. Pull out all batteries immediately to cut power completely before proceeding.
Detach the Indoor Faceplate
Locate the mounting bolts securing the indoor faceplate to the door assembly. Use a Phillips screwdriver to remove these bolts and gently pull the faceplate away from the door.
Press Reset Button While Reinserting Batteries
Find the Reset button inside the now-exposed battery compartment area. Press and hold this button firmly with one hand while you reinsert the batteries with the other.
Listen for Distinct Chime Confirmation
Keep holding the button until you hear a clear chime sound. This audio cue confirms the factory reset sequence has successfully initiated and you can release the button.
Reassemble Lock Components
Place the indoor faceplate back onto the door and tighten the mounting bolts securely. Replace the battery cover to finish the physical reset process.
Perform Hard Reset on Yale Nest XCL Smart Lock
Use this specific method if you own the Yale Nest XCL model or if your lock remains unresponsive despite a green blinking Nest Connect light. This process requires accessing the internal circuit board.
Extract All Four Batteries
Open the battery compartment and remove all four batteries one by one. Ensure the device has absolutely no power source before attempting disassembly.
Loosen Inner Housing Screws Carefully
Remove the two Phillips-head screws on the inner side of the lock housing. Do not disconnect the ribbon cable connecting the circuit board to the back cover as this causes permanent damage.
Hold Blue Reset Button on Circuit Board
Identify the small blue reset button located on the left side of the exposed circuit board. Press and hold this button down firmly before adding power back to the system.
Reinstall Batteries While Maintaining Pressure
While keeping constant pressure on the blue button, reinsert the four batteries into the compartment one at a time. Continue holding the button without releasing it.
Verify Beep and Screen Messages
Wait for an audible beep and watch the screen display “Erasing all settings. Hide from jail and Nest.” The screen will then prompt “Press the Yale logo to begin” indicating success.
Tighten Screws and Boot System
Release the button and re-insert the housing screws ensuring they are snug but not over-tightened to prevent cracking. Press the Yale logo on the front keypad to boot the system.
Create New Master Code After Factory Reset
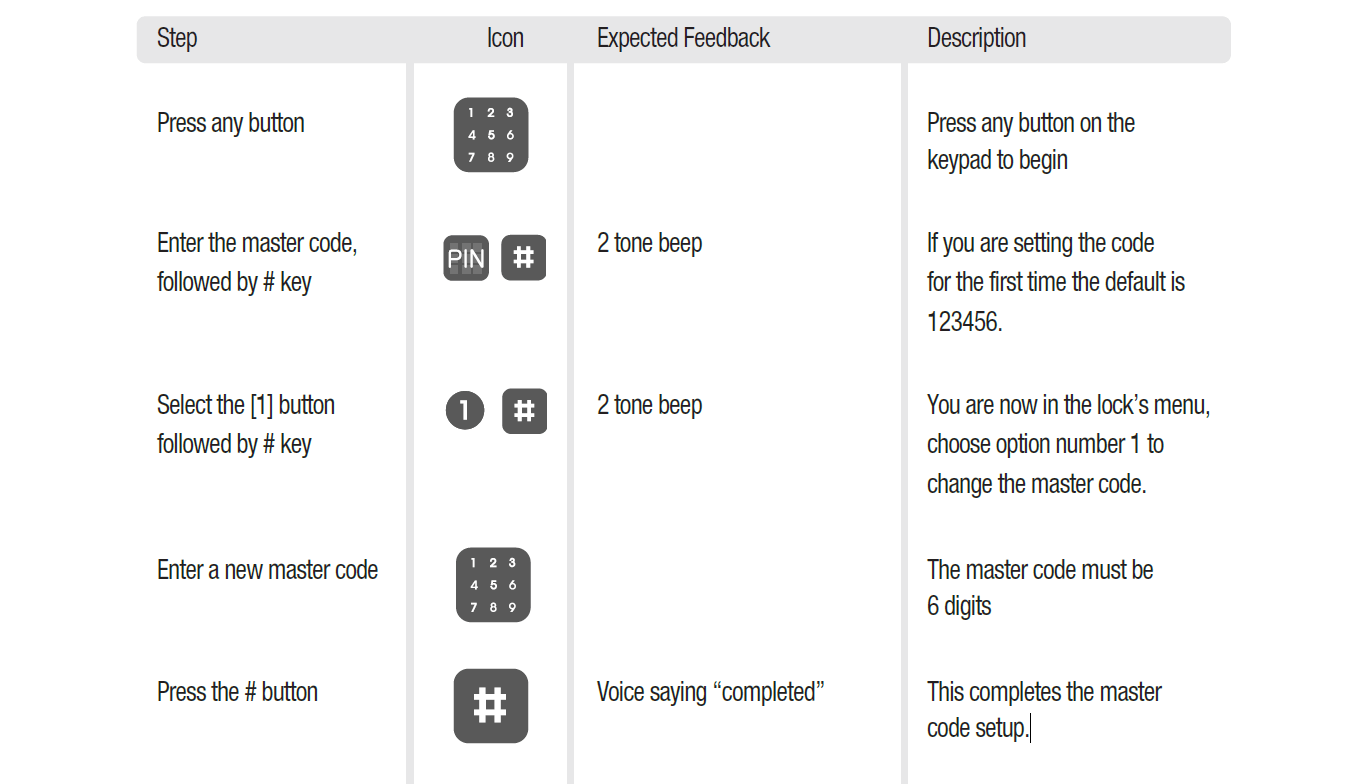
The lock boots into a dedicated setup mode immediately after erasing data. You must create a new administrative credential to regain control of the device.
Select Master Code Creation Option
Tap the screen option that says “Start by creating the master code.” This step establishes the primary administrative access level for the lock.
Enter Secure 4 to 8 Digit Code
Input a numeric code between 4 and 8 digits using the keypad. Avoid simple patterns like 1234 or 0000 and choose non-sequential combinations for better security.
Confirm Code and Close Door
Press the checkmark icon to confirm your entry. Ensure the door is physically closed before tapping the checkmark again to allow proper initialization.
Reconnect Lock to Nest App System
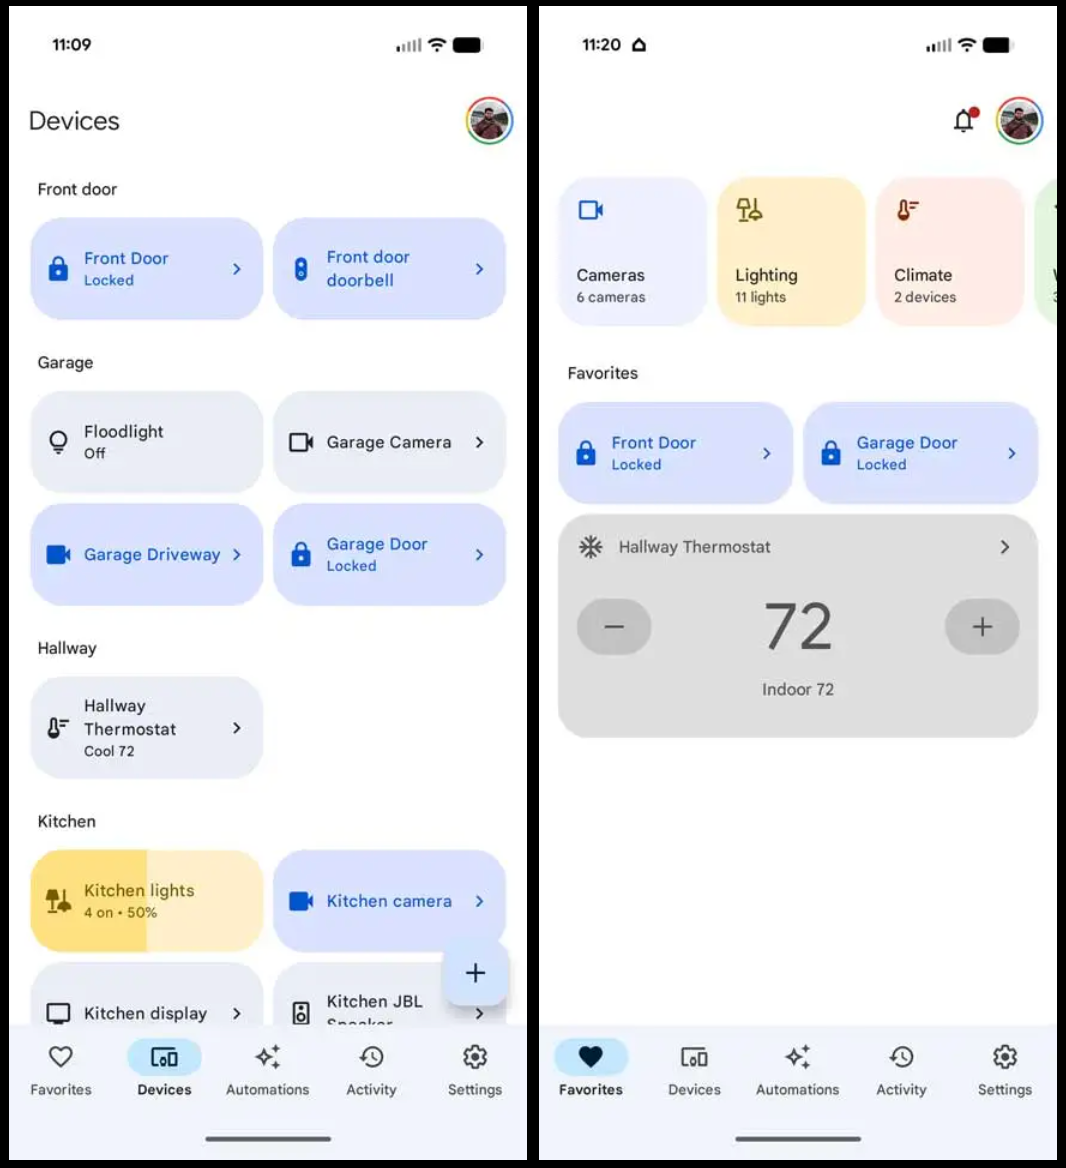
Smart features require re-pairing the hardware with your Nest account to restore remote access and notifications.
Activate Pairing Mode on Keypad
Step outside your home and press and hold the Yale logo on the exterior keypad. Keep holding until the lock enters pairing mode.
Open Nest App on Mobile Device
Launch the Nest app on your smartphone. The interface should detect the lock and display “Press and hold to add the lock to your Nest account.”
Complete Account Connection
Follow the in-app prompt to finalize the connection. The app will confirm “The lock has been added to your Nest account” once successful.
Skip Optional Passcode Update
You may see a prompt to change the passcode again during setup. Tap “Next” to skip this step if you wish to keep your newly created master code.
Manage Guest Access and User Codes
Once the master code is active you can add or remove users directly from the keypad or the mobile application.
Add New Guest User Profile
Tap “Add guest” on the interface and enter a user name like “Ryan.” Assign a secure passcode that is at least 6 digits long and avoid weak sequences.
Remove Existing Guest Access
Navigate to the guest list in the app or on the lock. Select the specific user you wish to remove tap “Remove access” and confirm the action to deactivate their code immediately.
Identify Data Deleted During Reset Process
A factory reset performs a comprehensive wipe of all stored information on the device. It is crucial to understand exactly what gets erased before proceeding.
Permanent Erasure of Access Credentials
All master and guest passcodes are permanently deleted during this process. You cannot recover these codes once the reset chime or beep confirms completion.
Removal of Schedules and Network Data
The system deletes all customized access schedules auto-lock timers and Wi-Fi credentials. Activity logs and usage history are also wiped clean from the memory.
Configure Security and Privacy Settings
Post-reset configuration includes enabling default security features that protect against unauthorized remote access.
Enable Default Privacy Mode
Privacy Mode activates automatically after a reset. This feature prevents remote unlocking via the app when the door sensor detects it is closed.
Implement Code Security Best Practices
Never reuse codes from other accounts or use birthdays. Store your master code in a secure password manager rather than writing it on paper near the door.
Troubleshoot Common Reset Failures
Certain issues may arise during the reset process requiring specific diagnostic steps to resolve.
Resolve Green Blinking Connect Light
If the Nest Connect blinks green but the lock does not respond perform the Hard Reset using Procedure B for the XCL model. This clears communication errors between the hub and lock.
Prevent Screw and Casing Damage
When reassembling the XCL model ensure you do not over-tighten screws. Snug is sufficient and forcing them can strip threads or crack the housing.
Protect Ribbon Cable Integrity
Never disconnect the ribbon cable during an XCL reset. It is not required for the procedure and disconnecting it can permanently damage the unit.
Maintain Lock Security and Performance
Regular maintenance ensures your Yale smart lock remains secure and functional for years of reliable use.
Prepare Device for Resale
Always perform a full factory reset before selling or gifting the lock. This protects your personal access history and ensures the new owner starts securely.
Refresh Guest Codes Regularly
Update temporary access codes monthly or after contractors leave your home. This minimizes security risks associated with lingering credentials.
Use Fresh Batteries for Setup
Replace batteries before starting a reset. Weak power can interrupt the setup process and cause pairing failures with the Nest app.
Compare Reset Methods by Model Type

Understanding the differences between models prevents confusion and hardware damage during the reset process.
| Feature | Standard Nest × Yale Lock | Yale Nest XCL Smart Lock |
|---|---|---|
| Reset Button Location | Inside battery compartment | Blue button on circuit board |
| Disassembly Required | Remove faceplate | Loosen housing screws |
| Critical Warning | None specified | Do not disconnect ribbon cable |
| Confirmation Signal | Audible chime | Beep plus on-screen text |
| Screw Type | Mounting bolts | Phillips housing screws |
| Reassembly Tip | Tighten bolts securely | Do not over-tighten screws |
Frequently Asked Questions About Yale Lock Resets
What happens if I reset my Yale lock without knowing the old code?
Resetting the lock erases all old codes including the unknown master code. You can then create a brand new master code to regain full access to your home.
Does resetting a Yale lock delete my activity history?
Yes, a factory reset permanently deletes all activity logs and usage history. This data cannot be recovered once the reset process completes.
Can I reset my Yale lock without removing the batteries?
No, you must remove the batteries to cut power completely. The reset sequence requires you to hold the button while reinserting the batteries to initiate the wipe.
Why is my Nest Connect blinking green after a reset attempt?
A green blinking light with no response indicates a communication error. You likely need to perform the specific Hard Reset procedure for the XCL model to clear this error.
Do I need the Nest app to reset the physical lock?
No, the physical reset process does not require the app. You only need the Nest app afterward to re-pair the lock and restore smart features.
Key Takeaways for Resetting Your Yale Lock
Resetting your Yale lock effectively clears all data and resolves most connectivity issues. Remember that the process differs between the standard Nest × Yale and the XCL model so follow the specific steps for your device. Always protect the ribbon cable on XCL units and ensure you have fresh batteries ready for re-pairing.
Take action now by gathering your tools and checking your model type before beginning. A successful reset restores your security and gives you full control over who enters your home.



