A stiff key turn or a lost set of keys often means it is time to learn how to change a lock cylinder. This common household task restores security and smooth operation to your door without requiring a professional locksmith.
This guide details the exact steps to measure, remove, and install a new cylinder for both residential and commercial doors. You will gain the confidence to complete this upgrade safely using only basic tools and precise measurements.
Identify Your Specific Lock Cylinder Type
Determining your lock type is the first critical step before attempting any removal. Most homes use Euro profile cylinders while offices often utilize commercial units with specific lever mechanisms.
Recognizing Euro Profile Cylinders
These are standard on uPVC and composite doors found in modern residences. They feature a uniform oval shape that slides directly into the central locking mechanism.
* Single cylinder: Requires a key outside and uses a thumb turn inside.
* Double cylinder: Needs a key for operation on both sides.
* Security features: Many include anti-snap or anti-pick technology.
Understanding Commercial Door Cylinders
These units appear frequently in high-traffic buildings and connect to lever handles rather than standard knobs. They often require specific angular alignment for removal.
* Key alignment: Removal usually needs the key turned to exactly 45 degrees.
* Lever release: A small push pin often releases the handle lever.
* Configuration: Must match left or right handed leaf settings.
Gather Essential Tools for Cylinder Replacement
You do not need an extensive workshop to perform this repair successfully. A few specific items will ensure the process remains quick and damage-free.
Required Tools and Supplies
- Replacement cylinder: Must match length and function exactly.
- Flat-head screwdriver: Needed to remove the edge security screw.
- Tape measure: Essential for recording millimeter-precise dimensions.
- Push pin: Required only for releasing commercial lever latches.
- Matching key: Necessary to align the internal cam during installation.
Pro Tip: Verify Before Removal
Purchase your new cylinder before removing the old one. This ensures you have a working lock available if the new part does not fit your specific door thickness.
Measure the Cylinder Correctly for Perfect Fit

Accurate sizing prevents gaps that compromise security or cylinders that stick out unsightly. You can measure your current unit either while it is still in the door or after removal.
Measuring Without Removing the Lock
This method works well if your current lock is still functional and in place.
1. Open the door fully to expose the vertical edge.
2. Locate the center fixing screw on the door edge.
3. Measure from the center of the screw hole to the outer face of the lock.
4. Measure from the center of the screw hole to the inner face of the lock.
5. Record these two numbers as your size (e.g., 40 mm outside plus 40 mm inside equals a 40/40 cylinder).
Measuring After Removal for Accuracy
If you have already taken the lock out lay it flat with the cam tongue pointing right. Measure from the center of the tapped screw hole to each end of the cylinder. These two figures define your required replacement size.
Commercial Depth Settings
Commercial units often have adjustable depth settings marked by flat sections on the body. Match this setting exactly to your door thickness to ensure proper engagement.
Remove the Old Euro Cylinder Safely
Most residential replacements follow a simple three-step process involving the edge screw and key alignment.
Step 1: Remove the Fixing Screw
Open the door and find the small flat-head screw on the vertical edge. Remove this screw completely as it locks the cylinder in place.
Step 2: Align the Internal Cam
Insert your key and turn it approximately 1/8 of a turn left or right. This rotation aligns the internal cam tongue with the cylinder body allowing it to slide out freely.
Step 3: Extract the Cylinder
Gently pull the key outward while holding it in the aligned position. The entire cylinder should slide out smoothly without force. If it sticks recheck your key angle slightly.
Install the New Lock Cylinder Securely
Installation mirrors the removal process but requires care to ensure the new unit seats flush against the door surface.
Insert and Align the New Unit
- Insert the key into your new cylinder.
- Turn the key 1/8 turn to align the cam tongue.
- Slide the cylinder into the door from the outside until it sits flush.
Reattach the Fixing Screw
Place the flat-head screw back into the door edge and tighten it firmly. Do not over-tighten as this can crush the cylinder and prevent the key from turning.
Commercial Cylinder Installation Steps
Commercial locks demand more precision due to their lever mechanisms and angular requirements.
Step 1: Set Key to 45 Degrees
Insert the key and rotate it exactly 45 degrees clockwise. This specific angle aligns the internal mechanism for lever removal.
Step 2: Release and Remove Lever
Find the small hole on the cylinder side and insert a push pin to release the latch. Slide the lever off the spindle gently.
Step 3: Extract and Replace
Turn the key to the 90-degree position and remove it. Pull the cylinder straight out. Insert the new unit push it in fully turn the key 45 degrees clockwise and then to 90 degrees to lock it in place.
Test the Lock Thoroughly Before Finishing
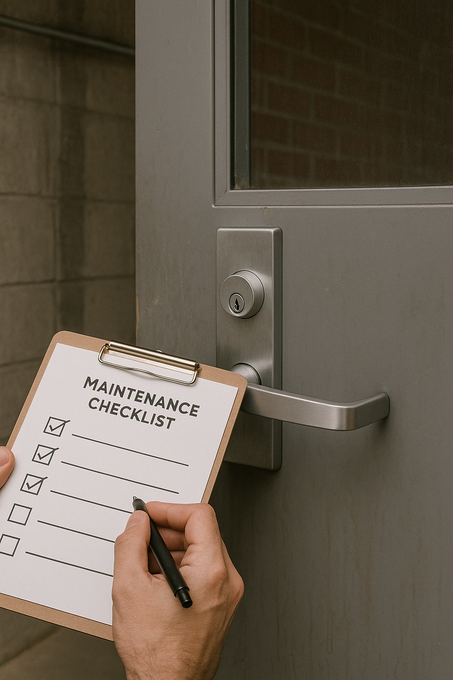
Never assume the installation is successful without verifying every function from both sides of the door.
Functional Checks to Perform
- Lock and unlock: Test key operation from interior and exterior.
- Latch movement: Ensure the bolt extends and retracts fully.
- Handle action: Verify the handle moves smoothly without binding.
- Thumb turn: Check that internal levers work freely if applicable.
Troubleshooting Common Issues
If the key won’t turn check that the cam is aligned correctly. If the cylinder feels loose ensure the central screw is snug but not crushing the mechanism. Use graphite powder for stiffness not oil.
Maintain and Extend Cylinder Lifespan
Proper care keeps your new lock functioning smoothly for over a decade with minimal effort.
Lubrication Tips
Apply dry graphite lubricant lightly into the keyway every six months. Avoid oil-based sprays like WD-40 as they attract dust and gum up internal pins over time.
Periodic Checks
Inspect the fixing screw every few months to ensure it remains tight. Watch for early signs of wear such as key wiggling or increased resistance when turning.
Avoid Common Mistakes During Installation
Small errors can lead to major security flaws or damaged hardware if you are not careful.
Measuring Errors
Measuring from the wrong point like the door edge instead of the screw center causes sizing issues. Always assume sizes might be asymmetric and measure both sides.
Misalignment During Installation
Failing to turn the key to the correct angle prevents the cylinder from sliding. Never force the lock as this damages the cam or internal pins permanently.
Over-Tightening Screws
Using excessive force on the fixing screw distorts the cylinder. Use hand pressure only to avoid jamming the mechanism.
Final Tips for Success on Your Project
Double-check that the cylinder sits flush with no gaps around the rim. Test the lock under real conditions by closing the door and locking it from the outside. Consider upgrading to an anti-snap model for added security.
Frequently Asked Questions About Changing Lock Cylinders
Can I change a lock cylinder without removing the old one first?
No you must remove the existing cylinder to measure it accurately unless you can clearly see the center screw hole. Measuring in-situ from the center screw to each face is the standard method for sizing.
What happens if my new lock cylinder is too long?
An overly long cylinder will protrude from the door creating a security risk and preventing the screw from tightening properly. It may also stop the door from closing fully against the frame.
Why will my key not turn after installing the new cylinder?
The internal cam tongue is likely misaligned with the lock body. Remove the cylinder ensure the key is turned slightly (1/8 turn) to align the cam and reinsert it gently.
Do I need special tools to change a commercial lock cylinder?
You typically need a push pin or small tool to release the lever latch in addition to a standard flat-head screwdriver. Commercial units also require precise 45-degree key alignment.
How often should I lubricate my new lock cylinder?
Apply dry graphite lubricant every six to twelve months or whenever the key feels stiff. Regular lubrication prevents internal wear and ensures smooth operation year-round.
Key Takeaways for Changing Your Lock Cylinder
Changing a lock cylinder is a fast effective way to improve home security and restore smooth door operation. Success depends on measuring from the center screw hole accurately and aligning the internal cam correctly during installation.
Always test your new lock from both sides before considering the job complete. With the right measurements and a simple screwdriver you can complete this upgrade in minutes.