
You just bought a SimpliSafe Smart Lock to upgrade your home security, and you are ready to install it without drilling holes or calling a pro. This device attaches to your existing single-cylinder deadbolt in about ten minutes to automate locking through your security system.
This guide walks you through every step of SimpliSafe smart lock installation from app setup to final calibration. You will learn how to check compatibility, choose the right adapter, and troubleshoot common issues to ensure your door locks securely every time.
Verify Door and System Compatibility First

You must confirm your current hardware works with the SimpliSafe ecosystem before opening the box. Skipping this step often leads to frustration if your door has the wrong lock type or your system is too old.
Confirm Your Deadbolt Type
The lock only functions with single-cylinder deadbolts that have a thumb turn inside and a keyhole outside. Double-cylinder deadbolts with keys on both sides are not compatible with this device. Check your interior door handle now to ensure you have a rotating thumb turn.
Check Base Station Requirements
Your home must have a SimpliSafe Gen 3 Base Station for the lock to communicate. You also need the SimpliSafe app installed on your phone and a stable Wi-Fi connection for the initial setup. Without these core components, the smart lock cannot pair or function.
Gather Your Installation Tools
- Phillips head screwdriver for tightening screws
- Painter’s tape to secure the exterior cylinder
- Small level for straight PIN Pad placement
Unbox and Identify All Components
Familiarizing yourself with the parts prevents confusion during the physical installation process. The Series 2 box contains several small but critical pieces you must keep organized.
Review Included Parts List
- Smart Lock Unit with four pre-installed AA batteries
- Mounting Plate held by wing latches on the back
- Four color-coded Tailpiece Adapters (Yellow, Blue, Red, Green)
- External PIN Pad with a battery activation tab
- Release Tool for adjusting wing latches
- Hardware Kit containing deadbolt screws, wood screws, washers, and adhesive strips
Keep the small adapters and screws in a safe place so they do not get lost before you select the correct fit.
Pair the Lock in the SimpliSafe App
You must start the pairing process in the app before mounting the physical lock to your door. This ensures the device is recognized by your base station immediately upon activation.
Add Device via Mobile Application
- Open the SimpliSafe app on your mobile device.
- Tap the three-bar menu in the top-left corner.
- Select “Add Device or Camera” from the list.
- Choose “Smart Lock” or “Smart Lock Series 2”.
Follow the on-screen prompts carefully to begin the digital pairing sequence.
Activate and Name Your Lock
- Slide the battery cover up on the lock unit to expose the interior.
- Press the setup button located above the batteries one time.
- Wait for the app to detect the signal and tap “Yes” when prompted.
- Assign a clear name like “Front Door” for easy identification later.
The app will guide you through the remaining physical installation steps once pairing is complete.
Secure the Exterior Lock Cylinder
Preventing the outside lock cylinder from falling out is the most critical safety step. If you skip this, the exterior cylinder can drop out of the door when you remove the interior thumb turn.
Apply Painter’s Tape or Get Help
- Place a strong strip of painter’s tape across the deadbolt face on the exterior side of the door.
- Alternatively, ask a helper to hold the cylinder firmly in place from the outside.
This simple step saves you from having to fish the cylinder out of the door frame later.
Remove the Interior Thumb Turn
- Ensure the door is in the unlocked position before starting.
- Unscrew and remove the existing thumb turn from the interior side.
- Save the original screws carefully as you will reuse them for the new mounting plate.
Do not remove the entire deadbolt assembly, only the interior knob mechanism.
Install the Mounting Plate Correctly
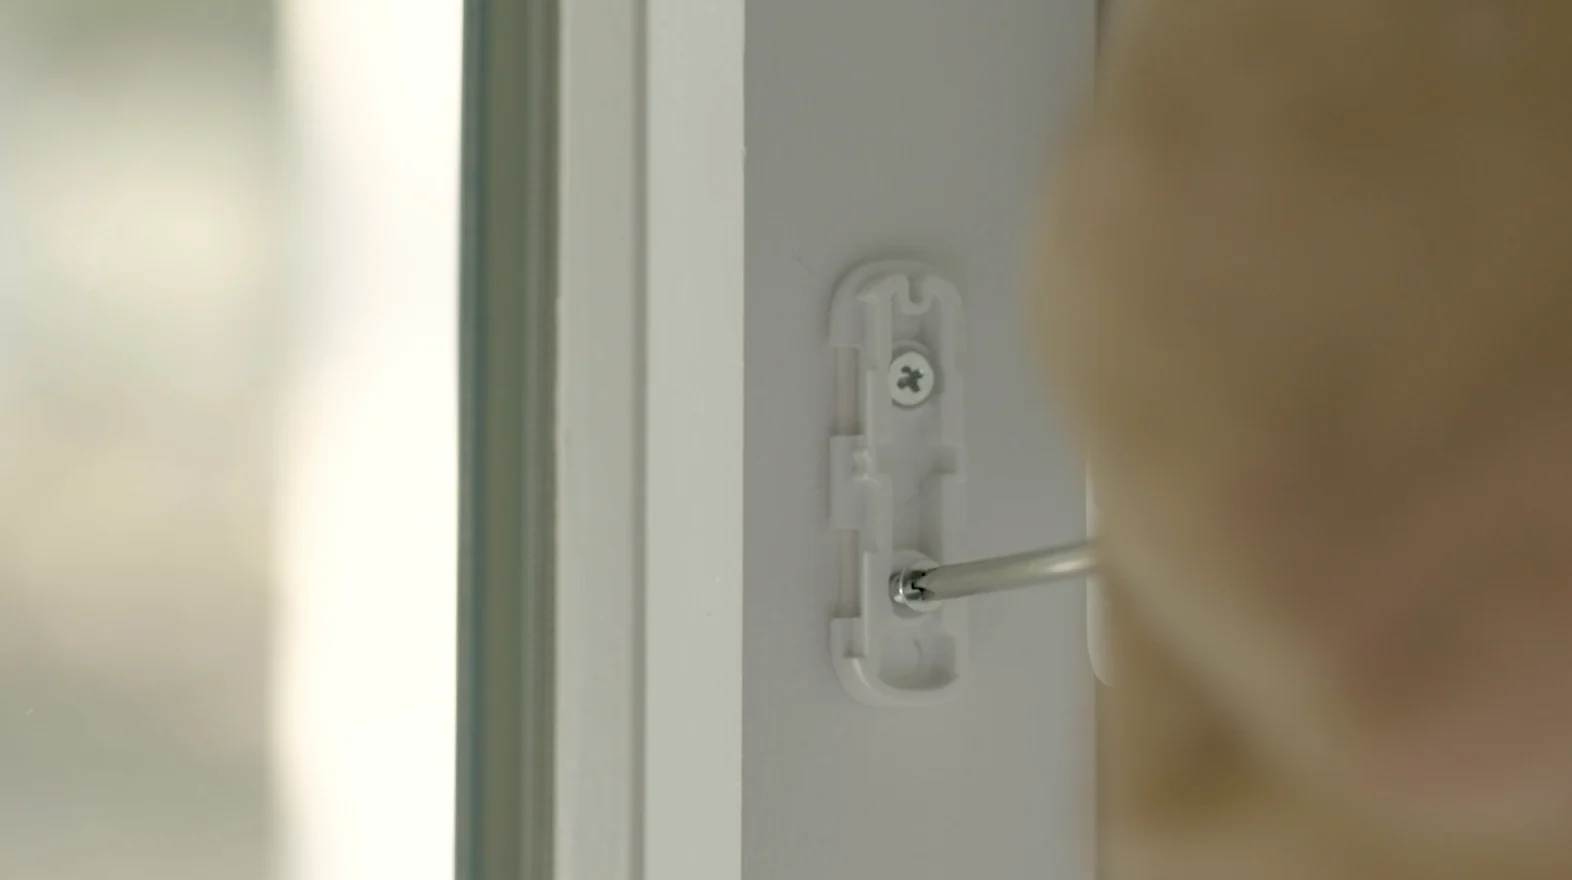
The mounting plate anchors the smart lock to your door and must be installed with precision. A bent or loose plate is a leading cause of installation failure.
Remove Plate from Lock Unit
- Use the release tool or your fingers to slide the wing latches outward on both sides.
- Pull the mounting plate free from the back of the smart lock unit.
Look for the label “This Side to Door” to ensure correct orientation during installation.
Align and Attach the Plate
- Slide the center hole of the plate over the existing tailpiece.
- Use your original saved screws to secure the plate to the door.
- Tighten gently but firmly, ensuring you do not over-tighten the screws.
Over-tightening can bend the metal plate and prevent the lock from seating properly.
Handle Screw Length Issues
- Use the shorter screws from the adapter box if original screws are too long.
- Add the included washers if screw heads are too small or weak.
- Ensure the plate sits completely flush against the door with no wobbling.
Choose the Right Tailpiece Adapter
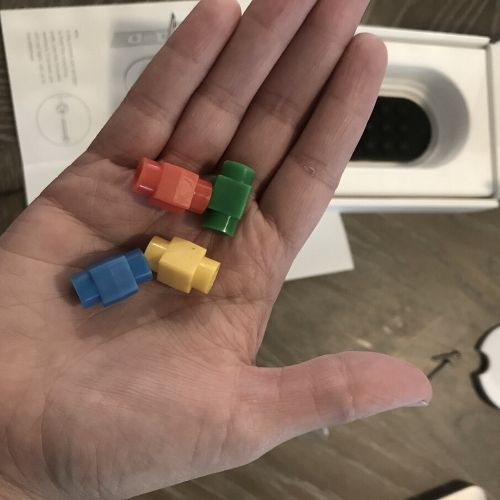
Selecting the correct adapter connects the motor to your specific deadbolt mechanism. Using the wrong one or forcing it can damage your lock or door.
Test All Four Color-Coded Adapters
Try sliding each adapter onto your tailpiece until you find a natural fit:
* Yellow, Blue, Red: Designed for horizontal or vertical tailpieces.
* Green: Specifically designed for diagonal tailpieces.
Never force an adapter onto the tailpiece as it should slide on smoothly.
Install with Correct Orientation
Once you find the matching adapter, ensure the door remains in the unlocked position. Slide the adapter onto the tailpiece so the small notch faces toward the door hinges. This orientation is vital for the locking motion to work correctly.
Verify Free Movement
Turn the adapter by hand to confirm it moves the deadbolt smoothly between locked and unlocked states. If you feel resistance or binding, recheck the adapter fit and notch direction immediately.
Attach the Smart Lock Unit
Now you will mount the motorized unit to the plate and adapter you just installed. Proper alignment here ensures quiet and reliable operation.
Prepare the Lock for Mounting
- Turn the thumb turn on the lock to the unlocked position.
- Slide both wing latches outward using your fingers or the release tool.
This opens the clamps so the unit can slide onto the mounting plate.
Mount to the Adapter
- Slide the lock unit over the installed tailpiece adapter.
- Gently turn the lock thumb turn until it aligns perfectly with the adapter.
- Push the lock flush against the mounting plate until it sits flat.
- Slide the wing latches inward until they click and grip the plate securely.
Check for Proper Fit and Function
- The lock should sit flat against the door with absolutely no gaps.
- Ensure there is no wobbling or looseness in the unit.
- Manually turn the thumb turn to verify smooth locking and unlocking.
If the unit will not seat, loosen the mounting plate screws slightly to realign everything.
Install the External PIN Pad
The external keypad allows you to unlock the door and disarm your system from the outside. Proper placement ensures easy access and future battery changes.
Activate the PIN Pad
- Remove the battery activation tab from the back of the unit.
- Wait a few seconds for the device to power on and pair with your base station.
It will automatically connect if your SimpliSafe base station is nearby and active.
Choose Mounting Location and Method
- Mount on the door exterior or on the adjacent door frame or wall.
- Ensure at least 3 inches of clearance below the unit for future battery access.
- Avoid direct sunlight or areas exposed to heavy rain unless using a protective cover.
Secure with Adhesive or Screws
- Adhesive strips: Clean the surface thoroughly, peel the backing, and press firmly for 30 seconds.
- Screws: Use the included hardware for a permanent and secure mounting solution.
Use a small level to keep the pad straight, especially if mounting it on a wall.
Calibrate and Test the Lock
Finalize your SimpliSafe smart lock installation by running the calibration sequence in the app. This teaches the lock the exact travel distance of your specific deadbolt.
Run Calibration in the App
- Return to the main screen of the SimpliSafe app.
- Follow the prompts to start the calibration process.
- Watch as the lock automatically cycles through locking and unlocking positions.
This step is essential for the lock to know when your door is fully locked or unlocked.
Troubleshoot Calibration Failure
If calibration fails, check these common issues:
* Adapter fit: The wrong or misaligned adapter is the number one cause.
* Mounting plate: A bent or over-tightened plate restricts movement.
* Door position: Ensure the door is fully closed during calibration.
Retry the process with the door in the unlocked position if the first attempt fails.
Test All Lock Functionality
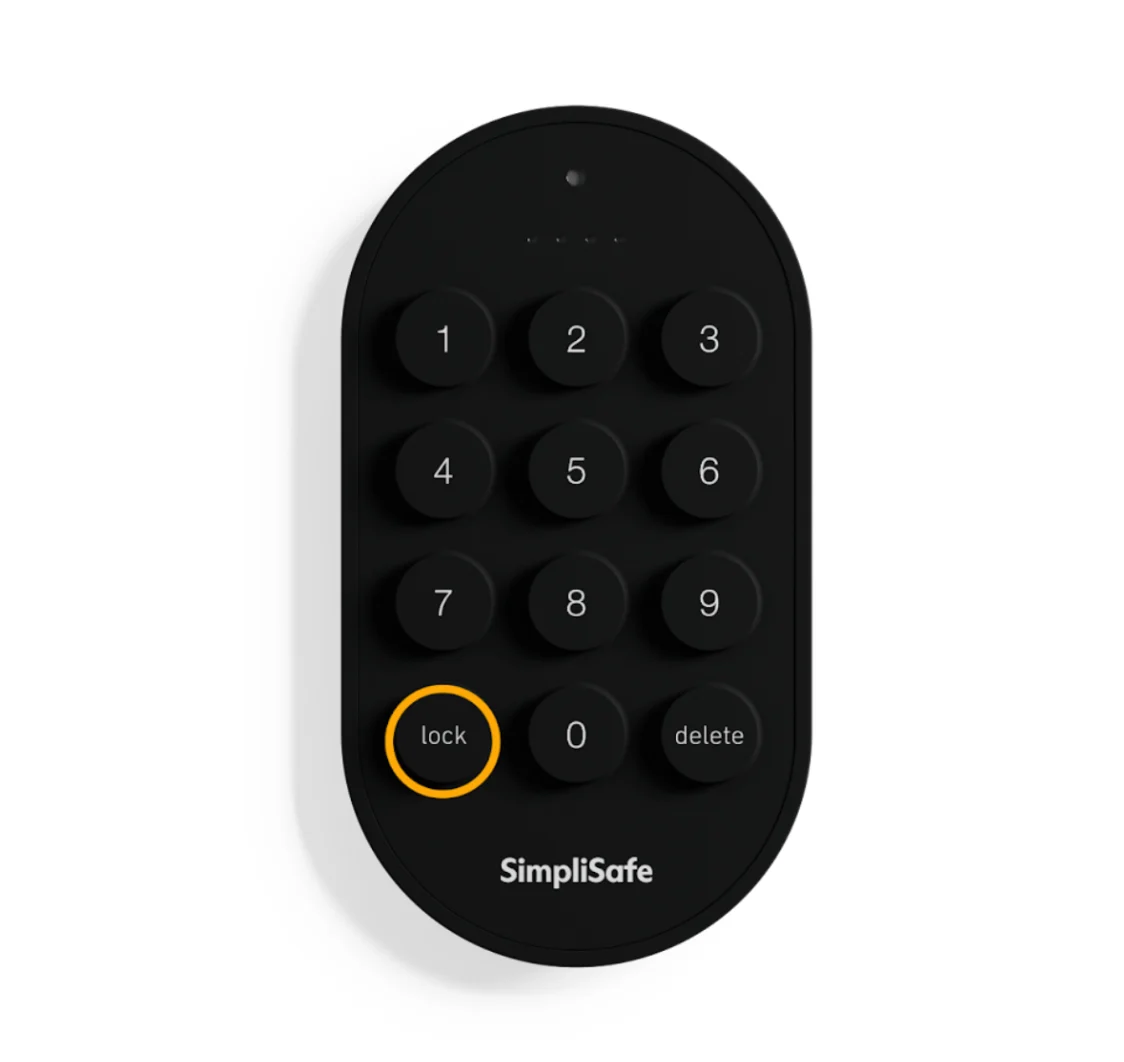
Verify that every control method works before considering the job complete. Comprehensive testing ensures your security system is reliable.
Test PIN Pad Unlock
- Enter your Master PIN on the external keypad.
- Confirm the door unlocks and the SimpliSafe system disarms.
- Listen for the audible confirmation tone from your base station.
Test App Control and Auto-Lock
- With the door open, use the app to lock and unlock the device.
- Enable Auto-Lock in settings and set a timer like 30 seconds.
- Close the door while unlocked to see if it engages automatically after the delay.
Sync with Entry Sensor and Configure Settings
Advanced configuration prevents errors and adds powerful security features to your setup. These optional steps maximize the value of your investment.
Sync with Entry Sensor
Syncing prevents the lock from trying to engage while the door is physically open. Go to Smart Lock settings in the app, select “Sync with Entry Sensor,” and press the setup button on your sensor when prompted.
Set Up Duress PIN and Auto-Lock
Create a hidden Duress PIN that unlocks the door while silently alerting monitoring centers to an emergency. You can also enable “Lock on Arm” so the door locks automatically whenever you arm your security system.
Frequently Asked Questions About SimpliSafe Smart Lock Installation
Can I install this on a double-cylinder deadbolt?
No, the SimpliSafe Smart Lock only works with single-cylinder deadbolts that have a thumb turn on the inside. Double-cylinder locks with keys on both sides are not compatible.
Do I need to drill holes in my door for installation?
No drilling is required for installation. The device attaches to your existing deadbolt using the original screw holes, making it ideal for renters.
What happens if calibration fails during setup?
Calibration failure usually means the tailpiece adapter is misaligned or the mounting plate is bent. Check that the adapter notch faces the hinges and ensure the plate is not over-tightened.
How often do I need to replace the batteries?
The smart lock batteries last about one year, while the PIN Pad batteries last up to two years. The app sends a low-battery notification 30 days in advance so you can replace them proactively.
Can I use this lock without a SimpliSafe Base Station?
No, the lock requires a Gen 3 SimpliSafe Base Station and the mobile app to function. It cannot operate as a standalone smart lock outside the SimpliSafe ecosystem.
Key Takeaways for Successful SimpliSafe Smart Lock Installation
Proper preparation and adapter selection are the most critical factors for a successful SimpliSafe smart lock installation. Always secure the exterior cylinder with tape before removing the interior thumb turn, and ensure the tailpiece adapter notch faces the door hinges.
Double-check that your mounting plate sits flush without over-tightening the screws to avoid mechanical binding. Follow the app calibration steps carefully to teach the lock your specific deadbolt travel distance.
Complete your setup by testing the PIN pad, app controls, and auto-lock features to ensure total reliability. Your door is now ready to provide automated security and peace of mind for your home.



