If your Kwikset lock knob sticks or the key refuses to turn, dried lubricant or internal debris is likely the culprit. Most homeowners face this common issue with locks over ten years old rather than total mechanical failure. You can often resolve these problems yourself in under an hour without replacing the entire lockset.
This guide details how to diagnose specific failures like partial rotation or free spinning. You will learn proven cleaning techniques and how to replace the internal latch mechanism for a fraction of the cost of a new unit. Follow these steps to restore smooth operation and extend the life of your current hardware.
Diagnose Your Specific Lock Failure Symptoms

Identifying the exact symptom determines whether you need a simple cleaning or a part replacement. Mechanical wear and friction buildup present different signs that require distinct repair paths.
Partial Rotation or Sticking Knob
The interior knob may turn halfway and stop if internal friction blocks full engagement. Dried grease or dust accumulation often causes this gritty feeling during rotation. The cam engages partially but struggles to push the latch bolt back completely.
* Visual cue: The latch extends but fails to retract fully when you turn the knob.
Key Won’t Turn Fully
Hardened lubricant inside the cylinder often prevents the exterior key from rotating a full 90 degrees. Forcing the key can break internal pins so apply penetrating lubricant gently instead. Work the key in and out slowly to distribute the fluid.
* Warning: If the key turns but the deadbolt stays still the issue lies within the deadbolt assembly itself.
Latch Operates But Deadbolt Fails
This scenario indicates the main latch mechanism works while the deadbolt assembly has failed. Focus your troubleshooting on the deadbolt cylinder connecting rod or the bolt mechanism. Do not waste time repairing the main latch since it functions correctly.
Knob Spins Freely Without Retracting Latch
A knob that turns with zero resistance suggests the internal cam is worn or disconnected. Cleaning will not fix this physical disconnect so you must replace the internal latch mechanism. Test this by removing the knob and turning the square spindle manually.
* Pro tip: If the cam does not rotate when you turn the spindle manually the internal connection is broken.
Clean and Lubricate the Mechanism Effectively
Deep cleaning and proper lubrication resolve most sticky or slow operations especially in older locks. This non-invasive method removes hardened debris and restores smooth movement to existing hardware.
Remove the Lock Assembly Safely
- Unscrew the mounting screws on both the interior and exterior trim plates using a screwdriver.
- Gently slide the entire handle set out through the door bore to access internal parts.
- Slide the latch mechanism out sideways from the edge of the door for inspection.
* Note: Take photos during removal to remember the orientation of the wedge and trim alignment.
Clean All Moving Parts Thoroughly
Use a two-step process involving penetration and scrubbing to remove years of grime. Spray WD-40 lightly into the latch channel and let it sit for two minutes to dissolve old grease. Dip a Q-tip in rubbing alcohol to scrub the cam pivot points and latch bolt track.
* Rotate the cam manually while wiping contact points to ensure deep cleaning.
* Repeat the process until the Q-tip comes out clean with no residue.
* Avoid compressed air as it can force debris deeper into the mechanism.
Apply Correct Lubricant Types
Selecting the right lubricant prevents future buildup and ensures long-term reliability. Heavy grease and silicone spray attract dust and harden over time so avoid them completely. Use light machine oil regular motor oil or graphite powder for best results.
* Apply two to three drops of oil to the cam pivot and latch spring only.
* Use a Q-tip to spread a thin film across moving surfaces without pooling.
* Work the latch in and out ten times to distribute the oil evenly.
Replace the Internal Latch Mechanism
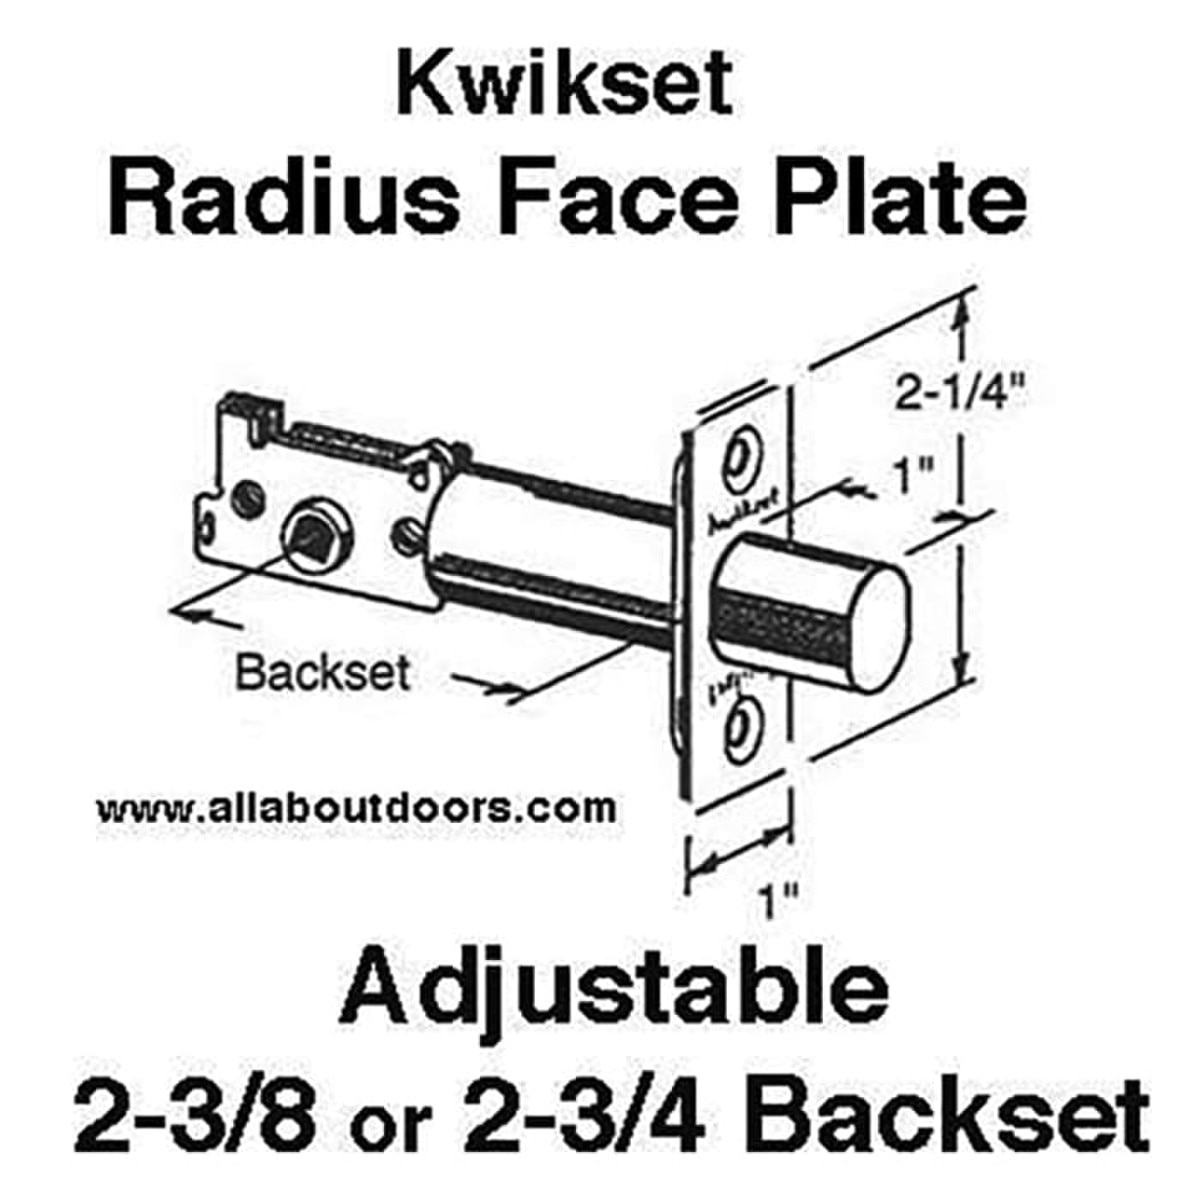
Replace the internal latch mechanism if cleaning fails or the knob spins freely without moving the latch. This repair costs under ten dollars and preserves your existing keys and handle aesthetic.
Buy the Right Replacement Part
Search for a Kwikset interior latch mechanism replacement at major home improvement stores or online retailers. Most kits fit Kwikset lever and knob styles from the past twenty years and include necessary mounting hardware. Ensure the kit includes a new latch body with cam and interior oval trim plate.
* Kit includes: New latch body interior oval trim plate exterior rectangular plate and mounting screws.
* Cost estimate: Expect to pay between seven and nine dollars for the complete kit.
Install the New Latch Mechanism
Follow this precise installation protocol to ensure your new latch functions correctly without binding. Proper alignment of the interior plate is critical for the door to close and latch automatically.
Remove Old Components Completely
- Unscrew the trim plates on both sides of the door to release the assembly.
- Pull the handle assembly out from the door bore carefully.
- Slide the old latch out from the edge bore to make room for the new part.
* Keep the existing knobs and cylinder since only the internal mechanism requires replacement.
Insert the New Mechanism Correctly
- Feed the new latch from the interior side sliding it into the door bore first.
- Align the flange so the small metal tab catches the oval interior plate securely.
- Orient the plate correctly with the angled edge facing inward toward the room.
* Pro tip: Press the latch button in during insertion if the mechanism binds to reduce width.
Reattach Trim and Knobs Securely
- Slide the Kwikset trim cover over the mechanism and squeeze gently until it clicks.
- Reattach the interior handle by aligning the square hole with the spindle exactly.
- Insert and tighten the long mounting screws from the interior side firmly.
* Use needle-nose pliers with a cloth if the cover requires extra pressure to snap on.
Fix Common Installation Errors

Avoid these frequent mistakes to ensure your repair lasts and functions smoothly every time. Even experienced DIYers often overlook simple orientation details that cause immediate failure.
Interior Plate Installed Backward
A door that won’t close or latch automatically usually has the interior plate reversed. Remove the plate and reinstall it with the angled edge facing inward like a ramp leading into the room. This angle allows the door jamb to push the latch back during closure.
Cover Won’t Snap On
Misalignment or debris in the groove often prevents the cover from locking into place. Ensure the latch is fully seated and clean the snap groove with a dry cloth before trying again. Apply light pressure with pliers wrapped in tape to avoid cracking the finish.
Knob Feels Loose After Reassembly
Loose knobs result from screws that are not tightened fully or a spindle that isn’t engaged. Remove the knob to verify the square spindle connects to the cam properly before tightening screws. Secure mounting screws firmly but do not over-tighten as this can warp the housing.
Rapid Re-Failure After Lubrication
Applying too much oil attracts dust and forms sludge that causes rapid re-failure. Disassemble the lock again and clean all parts with rubbing alcohol to remove the excess oil. Reapply only one to two drops of light machine oil to prevent future buildup.
Prevent Future Lock Failures
Regular maintenance prevents ninety percent of lock issues and extends the life of your hardware significantly. Follow this simple schedule to keep your Kwikset lock operating smoothly for decades.
Wipe Down Monthly
Use a dry cloth to clean the latch bolt and strike plate every month. Remove lint dust or paint buildup around the door edge to prevent debris from entering the mechanism.
Re-Lubricate Every One to Two Years
Apply light oil every twenty-four months or sooner if operation feels stiff. Focus on the cam latch spring and spindle holes to maintain smooth rotation.
Avoid Harsh Chemicals
Never use bleach ammonia or abrasive cleaners on lock finishes as they damage plating. These chemicals accelerate internal corrosion and degrade the protective coating on your hardware.
When to Call a Locksmith
Call a professional if the key cylinder is jammed and won’t accept the key at all. You should also seek help if the deadbolt won’t extend even after cleaning or if you suspect internal pin damage. Misaligned door frames or strike plates may require carpentry skills beyond simple lock repair.
Frequently Asked Questions About Kwikset Lock Repair
Can I fix a Kwikset lock that spins freely?
No cleaning will fix a freely spinning knob because the internal cam is physically worn or disconnected. You must replace the internal latch mechanism to restore function since the connection is broken.
How often should I lubricate my Kwikset lock?
You should lubricate your Kwikset lock every one to two years or whenever operation feels stiff. Regular maintenance prevents lubricant degradation which is the primary cause of failure in older locks.
What lubricant works best for door locks?
Light machine oil regular motor oil or graphite powder work best for reducing friction without heavy residue. Avoid heavy greases and silicone sprays as they attract dust and harden over time.
Why won’t my door latch after repairing the lock?
The interior plate is likely installed backward with the angled edge facing outward instead of inward. Remove the plate and reinstall it so the angle faces the room to allow proper latching.
Do I need to replace the whole lock if the key sticks?
No you usually do not need to replace the whole lock if the key sticks due to hardened lubricant. Cleaning the cylinder with penetrating oil and re-lubricating often restores smooth key rotation.
Key Takeaways for Successful Kwikset Lock Repair
Most Kwikset lock problems stem from dried lubricant or reversible installation errors rather than broken parts. By cleaning with WD-40 and alcohol then applying light oil you can restore full function quickly. Always check the interior plate angle and avoid over-lubricating to prevent repeat failures.
Take action today by diagnosing your specific symptom and choosing between cleaning or replacement. This simple repair saves money and extends the life of your lock for twenty years or more. Your door security depends on proper maintenance so do not delay fixing sticky or non-functional locks.