
You have forgotten the combination and your Brinks padlock refuses to budge. That silence from the shackle is frustrating, yet thousands face this exact scenario every year. The good news is that most Brinks locks open without the original code due to specific mechanical flaws.
This guide reveals tested methods to unlock Brinks combination and keyed padlocks using only tension and basic tools. You will learn how to decode four-wheel combos, shim brass models, and bypass unshielded cores safely. These techniques rely on physics rather than guesswork to restore access to your property.
Decode a 4-Wheel Brinks Combination Lock

Brinks four-wheel combination padlocks appear secure but leak internal clues under tension. You can decode the combination by feeling for binding wheels and listening for distinct clicks. This process works because manufacturing tolerances cause one wheel to bind tighter than the others.
The mechanism contains four wheels and four skates with only one true gate per wheel. All other positions are false gates designed to mislead you during rotation. Applying consistent pressure reveals the true gate through a slight give in the shackle mechanism.
Apply Consistent Upward Tension
Start by pulling firm upward pressure on the shackle without yanking it violently. Maintain steady force similar to holding a heavy door handle open. This pressure presses the internal locking bar against the wheels to create binding friction.
Use a carabiner looped through the shackle if your hands tire during the process. Hang the lock from a fixed point to let gravity maintain constant tension. Releasing this tension resets the internal feedback loop and forces you to start over.
Identify the Binding Wheel
Rotate each wheel slowly while maintaining upward pressure on the shackle. One wheel will feel noticeably stiffer than the remaining three during this rotation. This stiff wheel is the binding wheel currently blocking the shackle from releasing.
Wheels that spin freely are not binding and should be ignored for the moment. Focus all your attention on the specific wheel offering the most resistance. The binding order changes as you align digits correctly within the mechanism.
Adjust One Digit at a Time
Release the tension briefly once you have identified the stiffest wheel. Turn that specific wheel one digit forward in a clockwise direction immediately. Reapply firm upward tension to the shackle right after making this single adjustment.
Rotate the adjusted wheel again while listening for a click or feeling a slight upward movement. A distinct give indicates you have likely hit the true gate position. The wheel should feel looser under tension once the correct digit is set.
Pro Tip: Try turning one number backward if forward movement fails to produce a click. Some units respond better to counter-clockwise adjustments depending on internal wear.
Repeat Until All Wheels Align
Check the remaining wheels again after setting one wheel to the correct position. A different wheel will now become the stiffest binding point in the sequence. Repeat the cycle of finding the stiff wheel and adjusting it one digit at a time.
It may take two or three full passes to align all four wheels correctly. Do not rush the process since each click brings you closer to opening the lock. The shackle will release instantly with tension when all wheels are properly set.
Shim Brass Combination Padlocks Quickly
Some Brinks brass combination padlocks suffer from a critical design flaw involving exposed code wheels. A gap between the code wheels and the lock body allows direct access to the internal locking bolt. This vulnerability enables a shim bypass that takes only seconds to execute.
This flaw mirrors issues found in older Master Lock models from the 1980s. Many Brinks units still lack internal shielding around the code wheel area. You can exploit this gap to bypass the combination entirely without decoding anything.
Insert a Thin Metal Shim
Create a shim using a strip of aluminum from a soda can or a dedicated lock shim. Cut the material to approximately one inch wide and three inches long with a slight curve. Slide this shim between the shackle and the lock body starting at the front edge.
Ensure the shim is thin enough to slide smoothly but rigid enough to push internal components. Aluminum from beverage cans typically offers the perfect thickness for this task. Avoid using thick metal that might jam the mechanism permanently.
Navigate to the Locking Bolt
Gently push the shim toward the back of the lock mechanism past the code wheels. You are aiming for the locking bolt which acts as the internal lever holding the shackle. Do not force the shim if it catches on an internal component.
Adjust the angle of insertion if you meet resistance during insertion. The goal is to slide behind the wheels without damaging the internal structure. Patience ensures the shim reaches the target area effectively.
Depress the Bolt to Open
Press down on the shackle while simultaneously pushing the shim downward once positioned. This action physically depresses the locking bolt and bypasses the combination wheels completely. The shackle will pop open immediately without requiring the correct combination.
Warning: This method only works if a visible gap exists between wheels and the body. Newer models may seal this area to prevent shimming attempts.
Bypass Brinks 672 Series Cores

The Brinks 672 series features a laminated steel body that suggests high durability. However, these locks often lack any shielding behind the keyway core. This design oversight allows direct manipulation of the locking mechanism without picking pins.
Security experts have known about this vulnerability for over thirty years. Despite this knowledge, many units remain in circulation with unshielded cores. You can exploit this flaw to open the lock in seconds.
Insert a Probe Tool
Use a thin rigid probe such as a modified paperclip or tension wrench. Insert this tool directly into the keyway of the lock. You do not need to pick individual pins with this method.
The goal is to push past the pin chamber entirely. Ensure your tool is narrow enough to fit comfortably within the keyway. A wide tool may bind against the sides and prevent deep insertion.
Actuate the Internal Mechanism
Push the tool straight inward once it clears the pin chamber area. Alternatively, rotate the tool clockwise to mimic the action of a key turning. The lack of a shield allows the tool to reach the core mechanism directly.
The shackle releases instantly when the internal lever is actuated. This method fails only if a barrier plate is present inside the keyway. Always check the depth of the keyway before attempting this bypass.
Comb Pick 40mm Brass Padlocks
Standard 40mm Brinks brass padlocks often use basic pin tumblers without security features. These locks lack spool or mushroom pins that prevent simultaneous lifting. This absence makes them highly vulnerable to comb picking techniques from the 1930s.
You do not need skillful raking or single-pin picking skills for these models. The design allows all pins to be lifted at once with a single tool. This method is fast and requires minimal practice to master.
Use a Comb Shaped Tool
Select a comb-shaped picking tool with evenly spaced teeth. Insert the tool fully into the keyway of the lock. The teeth will press down on all driver pins simultaneously.
Ensure the comb matches the pin count of your specific lock model. Most 40mm Brinks pads use a standard five or six-pin configuration. Using the wrong size comb may damage the internal pins.
Lift All Pins Simultaneously
Push the comb hard downward while maintaining slight rotational pressure on the core. This force pushes all pins above the shear line at the exact same moment. The core rotates freely once the shear line is clear.
The lock opens immediately when the core rotates. Modern locks prevent this with varied pin shapes. Brinks 40mm models often lack these essential security pins.
Inspect Your Lock Before Attempting Fixes
Visual inspection saves time before you attempt any unlocking method. Check for specific flaws that indicate which technique will work best. This step prevents wasted effort on incompatible methods.
Look for Wheel Gaps
Examine the area between the code wheels and the lock body closely. A gap wider than 0.5mm indicates that shimming will likely succeed. No gap means you should proceed to tension decoding methods.
Test Keyway Depth
Insert a small tool into the keyway of keyed models to assess depth. A deep keyway with no blockage suggests core manipulation is possible. A shallow or blocked keyway indicates a shield may be present.
Check Shackle Movement
Pull on the shackle to test for slight movement under tension. Movement indicates that tactile decoding is viable for combination locks. No movement may mean the mechanism is seized and needs lubrication first.
Avoid These Common Mistakes
Errors during the unlocking process can stall your progress significantly. Avoid these frequent pitfalls to ensure success.
Using Excessive Tension
Applying too much force masks the tactile feedback needed for decoding. Use just enough pressure to bind the wheels without crushing the mechanism. Light pressure allows you to feel the subtle clicks of the true gate.
Skipping Re-Testing Steps
Always recheck all four wheels after adjusting one digit. The binding order shifts as wheels align correctly. Skipping this step leads to false positives and wasted time.
Confusing False Gates
False gates may produce a slight click but will not allow shackle movement. A true gate gives under tension and allows the shackle to retract slightly. Distinguish between these sensations carefully.
Frequently Asked Questions About Brinks Locks
Can I open a Brinks lock without the combination?
Yes, you can open many Brinks locks using tension decoding or shimming methods. These techniques exploit mechanical flaws rather than requiring the original code. Success depends on the specific model and its internal design features.
What is the default combination for Brinks padlocks?
The default factory combination for most Brinks padlocks is 1-2-3-4. Users often change this code and forget the new setting. Resetting to factory defaults usually requires knowing the current code first.
Does shimming damage the Brinks lock?
Shimming typically does not damage the lock if performed carefully with thin material. Aluminum shims slide past internal components without breaking them. However, forcing thick tools can bend internal bolts permanently.
Why does my 4-wheel lock feel stiff on one number?
Stiffness indicates that specific wheel is binding under tension. This binding occurs due to manufacturing tolerances within the mechanism. It is the primary signal used to decode the correct combination digit.
Are Brinks locks easy to pick?
Many Brinks brass models are easy to pick due to a lack of security pins. Standard pins allow for simple comb picking or raking techniques. Higher-end models may offer more resistance but often lack core shielding.
How long does it take to decode a Brinks combination?
Decoding a four-wheel Brinks lock typically takes under ten minutes with practice. The process involves iterative testing of each wheel under tension. Patience and tactile sensitivity are key to speed.
Key Takeaways for Unlocking Brinks Locks
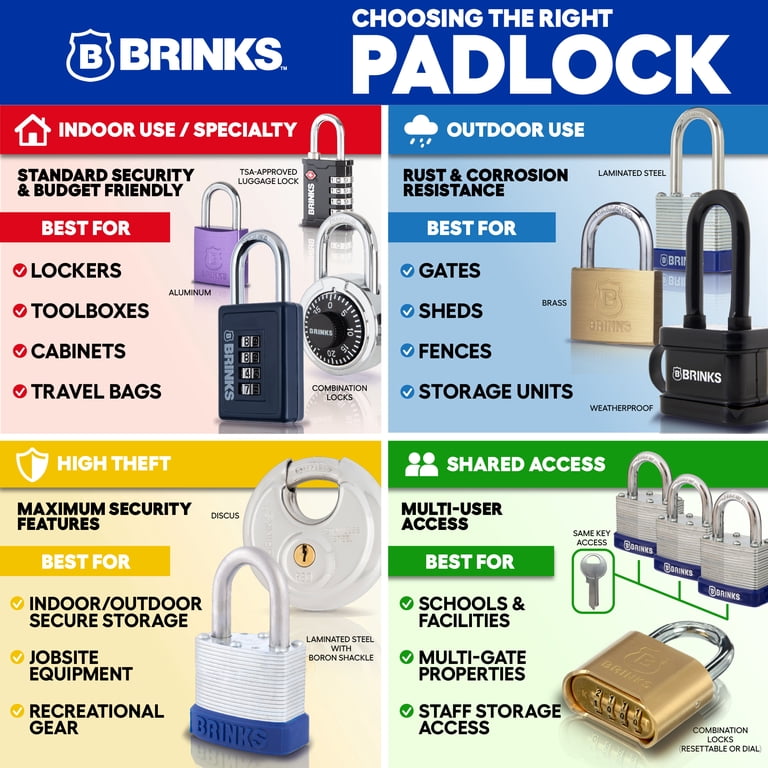
Most Brinks locks contain exploitable mechanical flaws ranging from tactile feedback issues to unshielded cores. You can bypass these security measures using tension decoding, shimming, or comb picking depending on the model. Always inspect your specific lock for gaps or binding wheels before choosing a method.
Start with the simplest approach like shimming for brass models or tension for combination locks. Avoid excessive force and retest wheels frequently to ensure accurate decoding. These techniques restore access to your property efficiently when used legally and responsibly.



