If your Honda Civic’s door locks ignore the remote or key, you likely face a common electrical or mechanical failure. Honda Civic door lock repair is a frequent necessity for models from 2005 to 2011 due to specific wiring and actuator weaknesses. Most owners discover the issue stems from a broken ground wire or a failed motor rather than a complex system crash.
This guide details how to diagnose electrical faults, replace dead actuators, and swap worn lock cylinders at home. You will learn to test circuits safely, fix broken harness wires, and reassemble panels without damaging trim. By following these steps, you can restore full function to your vehicle without an expensive dealership visit.
Diagnose Electrical Faults First
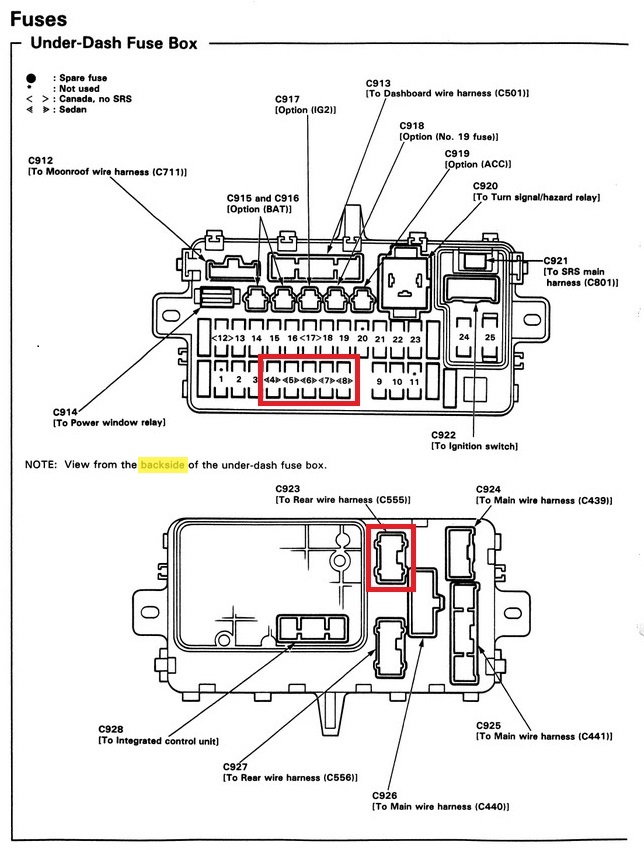
Start by confirming if your issue is electrical or mechanical before removing any panels. Many owners replace a working actuator because they miss a simple break in the wiring harness.
Understand the Lock System Logic
The Honda Civic uses a ground-supplying switch design for its power locks. When you press the lock button, the switch sends a ground signal to the ECU instead of sending power directly. This signal tells the ECU to trigger the door lock motors instantly.
The critical component is the black ground signal wire inside the door harness. This wire runs from the switch through the rubber boot between the door and frame. Constant flexing makes this specific wire the most likely point of failure.
Test the Ground Circuit
- Locate the wiring harness behind the driver’s kick panel near the dashboard. Look for gray or white connectors labeled for door controls.
- Disconnect the lock switch and use a multimeter to probe the black wire terminal carefully.
- Press the lock button on the switch while watching the meter. The black wire should show continuity to ground immediately.
- ✅ Shows ground? The switch and wiring are likely good.
- ❌ No ground? Either the switch is faulty or the ground path is broken.
Simulate a Ground Signal
Use a Power Probe or jumper wire to apply a 12V ground signal directly to the black wire at the ECU connector. This step isolates the problem area effectively.
* ✅ Doors lock/unlock? The actuators and ECU work, so the fault is in the switch or harness.
* ❌ No response? Suspect the ECU itself or the power supply line to the actuators.
Isolate the Fault Zone
Check if other controls like window switches or mirror controls in the same door are working properly. If they also fail, the entire door harness may be compromised significantly. If only the lock is dead, the issue is isolated to the black ground wire.
Identify Broken Wires in Door Harness

Over time, the constant opening and closing of the door fatigues wires in the hinge area. The black ground wire is the most vulnerable part of the bundle.
Inspect the Flex Zone
- Open the door fully and locate the rubber boot or sleeve between the door and A-pillar.
- Gently stretch the boot to expose the wires inside without tearing the rubber.
- Look for tight, kinked wires which are a sign of internal breakage.
- Bend each wire slightly to feel for fractures. A broken wire may still look intact but snaps internally.
Cut Open the Boot if Needed
If no visible damage is found, carefully slice open the rubber sleeve with a utility knife. Peel it back to inspect the full wire bundle thoroughly.
- Common sign: The black wire is stretched thin or has a clean break inside.
- Pro tip: Use a bright flashlight and magnifier to spot hairline fractures.
Repair with Reinforced Splice
Never just twist broken ends together because that spot will break again quickly. Instead, follow this permanent repair method.
- Cut out the damaged section of the wire completely.
- Add 6–8 inches of new 18-gauge wire as a bridge to create slack.
- Solder each connection and seal with heat-shrink tubing.
- Use waterproof connectors for extra protection against moisture.
👉 Always leave slack in the repair loop so the new splice does not take stress when the door moves.
Replace Door Lock Actuator (2005–2011)
If the electrical system checks out but one door won’t lock, the actuator is likely dead. Replacement takes under 90 minutes with the right tools.
Gather Tools and Prep
Tools needed:
* Plastic trim tools
* 10 mm socket with extension
* Phillips screwdriver
* Razor blade
* Gloves (for butyl tape)
Safety first: Disconnect the negative battery terminal to prevent shorts.
Remove Door Panel Safely
- Extract master window switch: Slide a trim tool under the side with the tab, lift gently, then pull the switch backward.
- Remove door handle hardware:
- Push the lock button in.
- Pop off the plastic block behind the handle.
- Release the small push-clip with a flat-blade screwdriver.
- Unclip the panel:
- Lift the top edge up to clear the window channel.
- Remove the top Phillips screw.
- Pull from the bottom, working around the edges to release plastic clips.
⚠️ Never force the panel as clips break easily.
Access and Remove Actuator
- Peel back vapor barrier:
- Remove rubber plugs.
- Slowly peel the plastic sheet, wearing gloves to handle sticky butyl tape.
- Lay it sticky-side up on a clean surface.
- Disconnect actuator harness: Press the top tab and pull the connector apart.
- Unhook actuator rod: Open the plastic clip and slide the rod out. The small lip may require wiggling.
- Clear window channel:
- Loosen the lower 10 mm bolt on the window run channel.
- Gently bend it forward for clearance.
- Remove actuator:
- Take out three Phillips screws.
- Unclip control cables by pushing both side tabs outward.
- Push the unit inward and maneuver it out through the access hole.
- Disconnect the orange keying piece from the lock cylinder cable.
⚠️ Actuator tabs are fragile so apply even pressure.
Install New Actuator
- Connect lock cable: Align the orange keying piece with the metal end and snap the side tabs in.
- Insert actuator: Feed it into the cavity and push until it seats.
- Reattach cables: Click them firmly into their retainers.
- Secure with screws: Tighten the three Phillips screws evenly.
- Reconnect rod: Slide it through the grommet and lock the clip. Ensure the lip catches.
- Reset window channel: Reposition and tighten the 10 mm bolt.
✅ Test function before reassembly to save time if something is misconnected.
Reassemble and Test
- Reattach vapor barrier:
- Feed wires and cables through.
- Press the butyl tape firmly to the door edge.
- Reinstall all rubber plugs.
- Plug in harness and snap the door panel back on.
- Reinstall screws and clips.
- Test everything:
- Remote lock/unlock
- Interior switch
- Window operation
- Inside/outside door handles
Replace Door Lock Cylinder

If the key won’t turn or the lock feels loose, replace the cylinder. This is a mechanical fix that requires no programming.
Remove Interior Trim
- Unlock the door using the key or switch.
- Pry off the door panel trim at the bottom with a flathead screwdriver.
- Carefully release the clips without cracking the plastic.
Remove Old Cylinder
- Pop off the cover: Use a screwdriver to remove the small plastic shield over the mechanism.
- Locate the 10 mm bolt: It secures the cylinder from the inside.
- Use a magnetic socket or grease: Prevent the bolt from falling into the door cavity.
- Unscrew and pull out the cylinder.
- Note the “ear” (locking tab) alignment as it must match the new unit.
Install New Cylinder
- Align the ear with the slot in the mechanism.
- Insert and push until you hear a click which means the toothed retainer is engaged.
- Apply white lithium grease to moving parts for smooth operation.
- Reinstall the 10 mm bolt and tighten.
- Snap the cover back on.
🔧 No calibration is required as this is mechanical only.
Test Lock and Handle Sync

- Insert the key and turn to lock or unlock.
- Verify the interior handle still opens the door when unlocked.
- Confirm the lock button moves with the key action.
If the handle doesn’t work, check the linkage rod behind the handle. It may have come loose during disassembly.
Prevent Future Failures
Even after repair, future issues can be avoided with simple precautions.
Add Slack to Repaired Wires
When splicing harness wires, always add extra length. A straight splice will break again. Create a small loop so the repair point doesn’t take tension.
Protect the Vapor Barrier
Cold butyl tape cracks easily. If the barrier won’t reseal:
* Warm it with sunlight or a low-heat hair dryer.
* Press firmly around the entire edge.
* Replace torn sections with butyl tape patches.
Water leaks lead to corroded actuators and short circuits.
Secure All Bolts
Use a magnetic socket or apply grease to bolt threads when working overhead. A loose 10 mm bolt can:
* Rattle inside the door
* Block drainage holes
* Damage the window regulator
Keep a small magnet on hand to retrieve dropped parts.
Common Mistakes to Avoid
| Mistake | Consequence | Fix |
|---|---|---|
| Breaking actuator tabs | Unit won’t secure | Replace actuator; use gentle pressure |
| Dropping cylinder bolt | Rattles, hard to retrieve | Use magnetic tools; tape socket |
| Forgetting window channel reset | Window binds or skips | Loosen bolt, reposition, retighten |
| Damaging vapor barrier | Water leaks, corrosion | Seal with butyl tape; replace if torn |
| Using metal tools on trim | Scratches, cracked panels | Use only plastic trim tools |
Final Tips for Success
- Work on a warm day: Butyl tape and plastic clips are more flexible.
- Organize screws and clips: Use a magnetic tray or small container.
- Pre-test actuators: Plug in before sealing the door to catch errors early.
- Label connectors: If unsure, mark them before disconnecting.
Honda Civic door lock repair doesn’t have to be intimidating. With the right approach, you can diagnose electrical faults, replace actuators or cylinders, and restore full function in under two hours. Focus on the ground circuit first as it is the most common culprit. Then tackle mechanical repairs with care, and always protect the vapor barrier and wiring from future stress.
Now that your locks are working, consider lubricating all door mechanisms annually with white lithium grease to extend their life. And keep that socket magnetized because you never know when a bolt might slip.
Frequently Asked Questions About Honda Civic Door Lock Repair
Why won’t my Honda Civic door lock with the remote but works with the key?
This usually indicates an electrical failure rather than a mechanical one. The most common cause is a broken black ground wire in the door harness or a failed door lock actuator motor.
How do I know if my door lock actuator is bad?
Signs include a humming sound from the door without movement, slow operation, or one specific door failing to respond while others work. Electrical testing can confirm if power is reaching the unit.
Can I repair the door harness wire instead of replacing it?
Yes, you can repair the broken wire by cutting out the damaged section and splicing in 6–8 inches of new 18-gauge wire. Ensure you use solder and heat-shrink tubing for a waterproof seal.
Do I need to program a new door lock cylinder?
No, the mechanical door lock cylinder does not require any electronic programming. You simply align the locking tab, insert it until it clicks, and secure it with the bolt.
What tool prevents scratching the interior panel during removal?
You should always use plastic trim removal tools. Metal screwdrivers can easily gouge the plastic or crack the panel clips during the removal process.
Why is my window binding after replacing the actuator?
This often happens if the window run channel bolt was not reset to its original position. Loosen the 10 mm bolt on the channel, reposition the glass, and retighten the bolt.
Key Takeaways for Honda Civic Door Lock Repair
Successful Honda Civic door lock repair starts with diagnosing the electrical ground circuit before assuming the motor is dead. Most failures in 2005–2011 models stem from a fractured black wire in the door harness or a worn-out actuator unit.
Always use plastic tools to protect your interior trim and secure all bolts with a magnetic socket to prevent them from falling inside the door. Properly sealing the vapor barrier with butyl tape is essential to prevent future water damage.
Take your time to test the system before full reassembly to ensure every function works correctly. With these steps, you can save significant money and restore reliable security to your vehicle today.