
Vibration and thermal cycling often cause bolted joints to loosen over time, leading to potential equipment failure or safety hazards. A split ring lock washer provides the mechanical tension needed to keep your fasteners secure against these dynamic forces.
This guide explains exactly how to use a lock washer with the correct stack order, orientation, and torque for maximum reliability. You will learn to distinguish between standard and high collar types while avoiding common installation errors that compromise joint integrity.
The Correct Washer Stack Order for Maximum Security
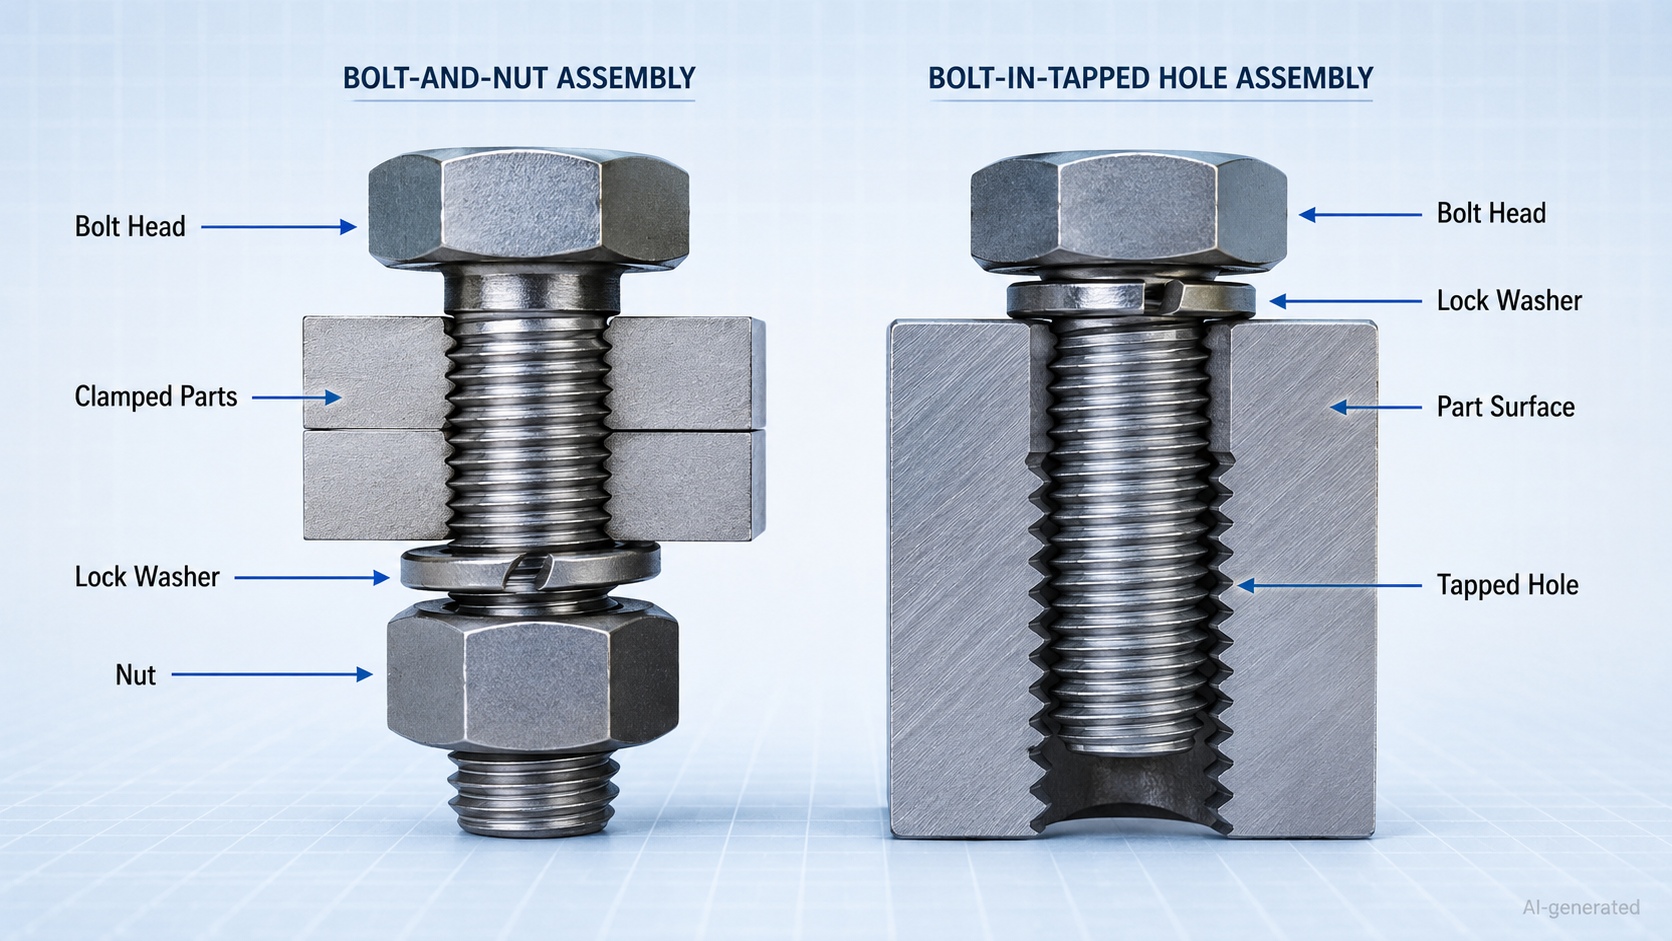
The sequence of components on your bolt determines whether the locking mechanism functions or fails completely. Even a single misplaced part can prevent the washer from biting into the mating surfaces effectively.
Step-by-Step Assembly Protocol
Follow this specific order to ensure the split ring compresses properly between the flat washer and the nut:
- Insert the bolt through the material hole.
- Slide the split ring lock washer onto the bolt shaft first.
- Place the flat washer on top of the split ring.
- Thread the nut onto the bolt and begin tightening.
This arrangement allows the lock washer to spring-load the connection. The split edges bite into both the flat washer above and the bolt head or nut below to resist rotation.
Why Sequence Matters for Locking Action
Placing the flat washer beneath the lock washer lifts the locking element away from the surface it needs to grip. This error blocks the edge biting action required to stop the nut from backing off. The lock washer must always sit directly against the surface it is meant to lock.
Proper Flat Washer Orientation and Placement
Flat washers feature two distinct sides that serve different functional purposes during installation. Installing them upside down reduces load distribution and increases the risk of surface damage.
Identifying the Correct Side
- Flat (Dull) Side: Faces down toward the lock washer and material.
- Slightly Convex (Shiny) Side: Faces up toward the nut or bolt head.
The dull side ensures even pressure distribution across the joint. The convex side directs force upward, preventing indentation on soft materials like aluminum or wood.
Visual Cues for Installation
Look for subtle curvature to identify the shiny side, as it reflects light more sharply than the dull face. If you install the washer incorrectly, the sharp edges of the lock washer may dig into your workpiece instead of the flat washer.
Mechanics of Split Ring Lock Washers
Understanding the physics behind the component helps you apply the correct torque during installation. These washers function as mechanical springs rather than static spacers.
How Spring Action Prevents Loosening
When you tighten the nut, the split ring washer undergoes elastic deformation. The twisted steel body compresses and flattens, generating a constant restoring force. This tension keeps the bolt threads engaged even as the joint settles.
The Dual-Locking Mechanism
The system relies on two simultaneous actions to secure the fastener:
- Spring Force: Maintains continuous axial pressure on the joint.
- Edge Biting: Sharp, twisted edges dig into the nut and flat washer to resist rotational movement.
This combination makes split ring washers highly effective against vibration, thermal expansion, and minor joint relaxation.
Choosing Between Standard and High Collar Types
Not all applications require the same level of locking force. Selecting the wrong variant can lead to under-performance or fastener damage.
Standard Split Ring Washers
These feature a thinner cross-section and are easier to compress. They require less torque to activate the spring action, making them ideal for:
- General purpose machinery
- Light automotive components
- Assemblies with mild to moderate vibration
High Collar Lock Washers
High collar variants are substantially thicker and stiffer than standard models. They demand higher torque to flatten but deliver superior clamping pressure for:
- Heavy-duty industrial motors
- Off-road vehicle suspensions
- Environments with extreme dynamic loads
Pro Tip: Do not substitute a high collar washer for a standard one without verifying your torque capabilities. The increased stiffness may require more force than your bolt grade can safely handle.
Applying Correct Torque During Installation
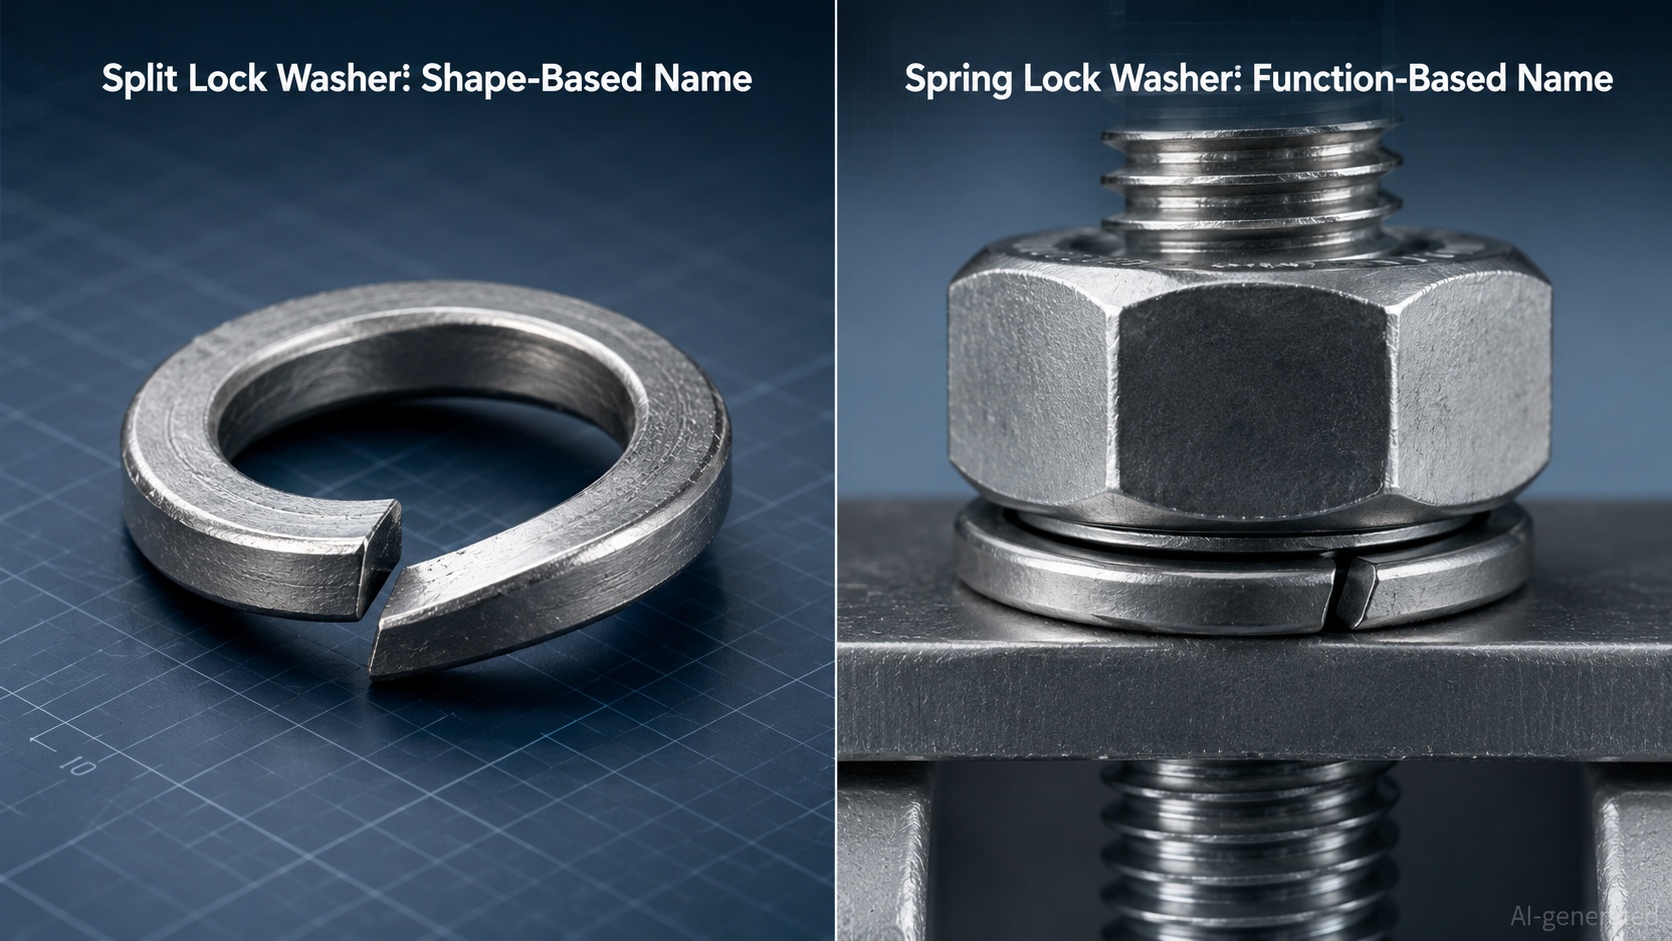
Torque application is the most critical step in activating the locking mechanism. Both under-torquing and over-torquing can render the washer useless.
Risks of Under-Torquing
If you do not tighten the nut enough, the split washer will not fully compress. Without full compression, the edges cannot bite into the mating surfaces, and no spring tension is generated. The nut will remain free to rotate under vibration.
Dangers of Over-Torquing
Applying excessive force causes the washer to fracture or lose its spring temper permanently. A deformed washer cannot rebound, meaning it provides zero locking action. Use a torque wrench to stay within the manufacturer’s specifications for your specific bolt grade.
Visual Verification of Proper Torque
Inspect the washer after tightening. The split gap should be nearly closed, indicating full compression. If the gap remains wide open, the washer is not engaged. If the washer is cracked, you have exceeded its limits.
Why You Must Never Reuse Lock Washers
Split ring lock washers are designed as single-use components. Reusing them is a primary cause of joint failure in vibrating equipment.
Loss of Spring Temper
Once compressed, the metal undergoes plastic deformation. The material loses its ability to return to its original shape, meaning it cannot generate the necessary restoring force. A reused washer acts like a flat washer with no locking capability.
Diminished Edge Biting Ability
The sharp edges that bite into surfaces become rounded or damaged after initial use. They cannot penetrate the mating surfaces effectively a second time. Always replace lock washers with new units during any disassembly process.
Upgrading Security with Thread Locker
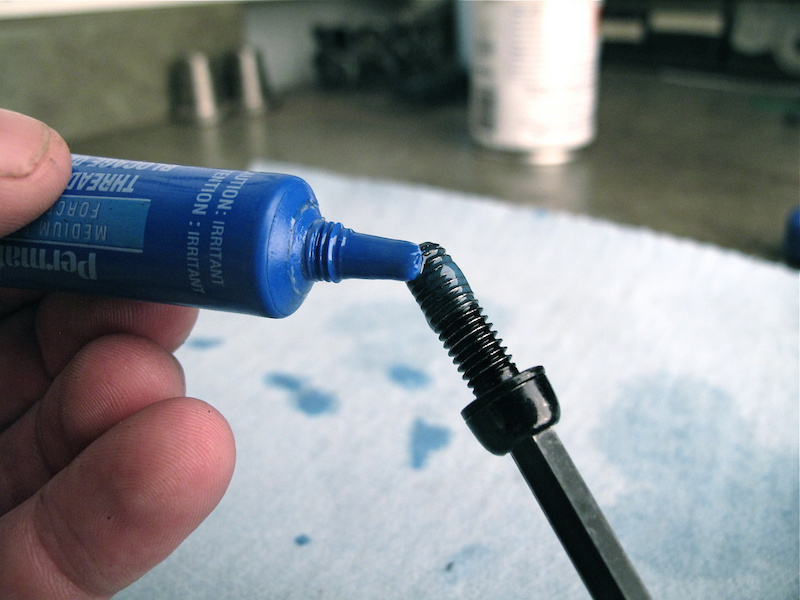
In extreme conditions, mechanical locking alone may not suffice. You can enhance security by combining washers with chemical agents.
When to Add Blue Thread Locker
Apply medium-strength blue thread locker to bolt threads for maximum protection. This creates a dual-defense system ideal for:
- Engine components
- Power tools
- Off-road vehicle parts
- Any assembly subject to constant shaking
Blue thread locker allows for future disassembly with standard tools, unlike red permanent variants. This combination provides both mechanical tension and a chemical bond to prevent loosening.
Common Installation Mistakes to Avoid
Even experienced mechanics make errors that compromise the integrity of the joint. Avoid these pitfalls to ensure your fasteners stay tight.
Placing Flat Washer Under Lock Washer
This is the most frequent error. Putting the flat washer against the material prevents the lock washer from biting. Always place the lock washer directly on the bolt shaft before the flat washer.
Using Incorrect Washer Sizes
A washer with an internal diameter too large for the bolt will shift and fail to center. Ensure the washer fits the bolt shaft snugly to maintain alignment and clamping efficiency.
Ignoring Washer Condition
Inspect every washer before use. Discard any units with cracks, nicks, or signs of corrosion. A damaged washer cannot provide consistent tension or biting action.
Visual Inspection and Maintenance Protocols
Regular inspection ensures your bolted joints remain secure over time. Look for specific signs of failure during maintenance cycles.
Signs of a Failed Lock Washer
- Fully Flattened Appearance: No residual spring tension remains.
- Cracks or Breakage: The metal has fractured due to stress.
- Rotation: The washer spins with the nut, indicating it never bit into the surface.
Replacement Strategy
Replace any washer showing signs of fatigue immediately. There is no way to reset the spring action of a used or failed washer. Proactive replacement prevents catastrophic joint failure in critical applications.
Frequently Asked Questions About Lock Washers
Can I use a lock washer without a flat washer?
You can, but it is not recommended for soft materials. Without a flat washer, the sharp edges of the lock washer may dig into and damage the workpiece surface. The flat washer distributes the load and protects the material.
How do I know if the lock washer is tightened enough?
The split gap in the washer should be nearly closed when properly torqued. If the gap remains wide, the washer is not compressed enough to generate spring tension or bite into the surfaces.
Is it safe to reuse a split ring lock washer?
No, split ring lock washers are single-use components. Once compressed, they lose their spring temper and locking ability. Reusing them creates a false sense of security and often leads to joint failure.
What is the difference between standard and high collar lock washers?
Standard washers are thinner and require less torque, suiting general applications. High collar washers are thicker and stiffer, providing greater spring force for heavy machinery and extreme vibration environments.
When should I add thread locker to my lock washer assembly?
Add blue thread locker for extreme vibration, frequent thermal cycling, or critical safety applications. This creates a dual-locking system combining mechanical tension with chemical adhesion for maximum security.
Key Takeaways for Using Lock Washers Effectively
Mastering how to use a lock washer requires strict adherence to stack order, orientation, and torque specifications. Always place the split ring directly on the bolt shaft, followed by the flat washer with its dull side down, and tighten until the split gap nearly closes.
Remember that these washers are single-use items that lose effectiveness after compression. Replace them every time you disassemble a joint, and consider adding blue thread locker for extreme vibration scenarios to ensure long-term reliability.



