
You have decided to upgrade your security system or move to a new home, but the old hardware stands in your way. Learning how to remove smart lock units correctly prevents costly damage to your door and preserves delicate electronics for future use.
This guide details every step required to disconnect power, unscrew hidden fasteners, and extract wiring harnesses from popular models like Schlage Encode. You will gain the confidence to dismantle complex locking mechanisms using standard tools while avoiding common pitfalls that strip screws or tear internal wires.
Disconnect Power Before Touching Hardware
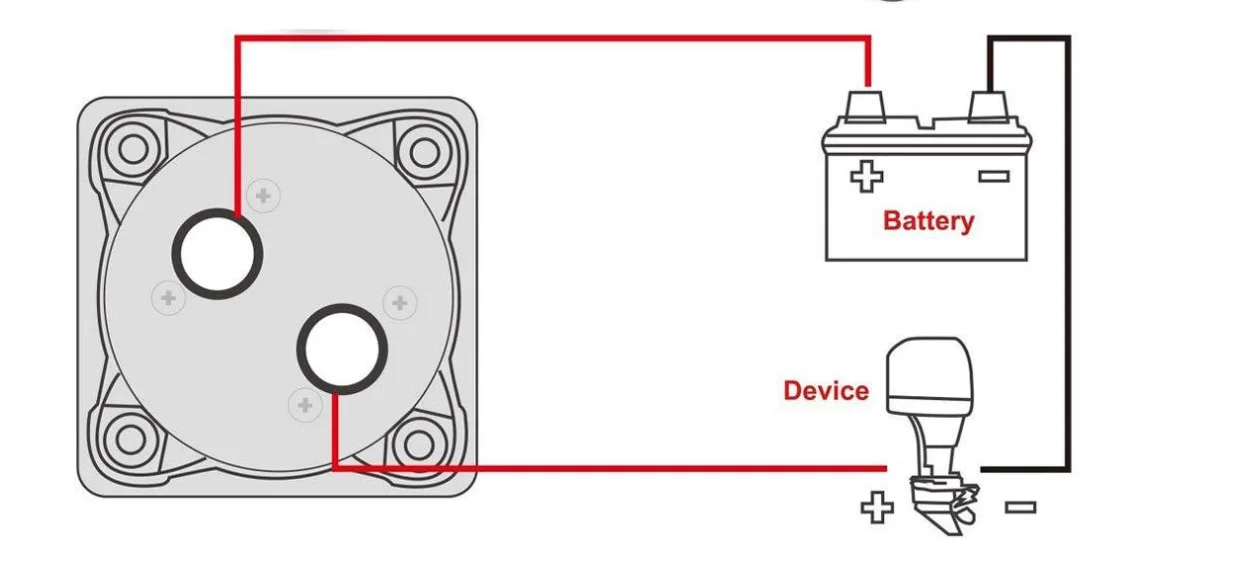
Safety is your first priority when working with electronic locks that contain live circuits. Even low-voltage battery systems can cause short circuits if metal tools bridge connections during removal.
Cut Off All Power Sources
You must eliminate electrical current before unscrewing any part of the assembly.
* Battery models: Open the compartment and remove all AA or AAA cells immediately.
* Hardwired units: Switch off the circuit breaker controlling the lock to ensure zero voltage.
Isolate Internal Wiring Paths
Trace the wiring from the battery compartment to the main motor unit. Take a photo of wire positions before disconnecting anything to assist with future installations.
⚠️ Warning: Never pull wires by the cable itself. Gripping the wire instead of the connector head can rip internal terminals loose.
Remove Front Face Screws to Access Internals
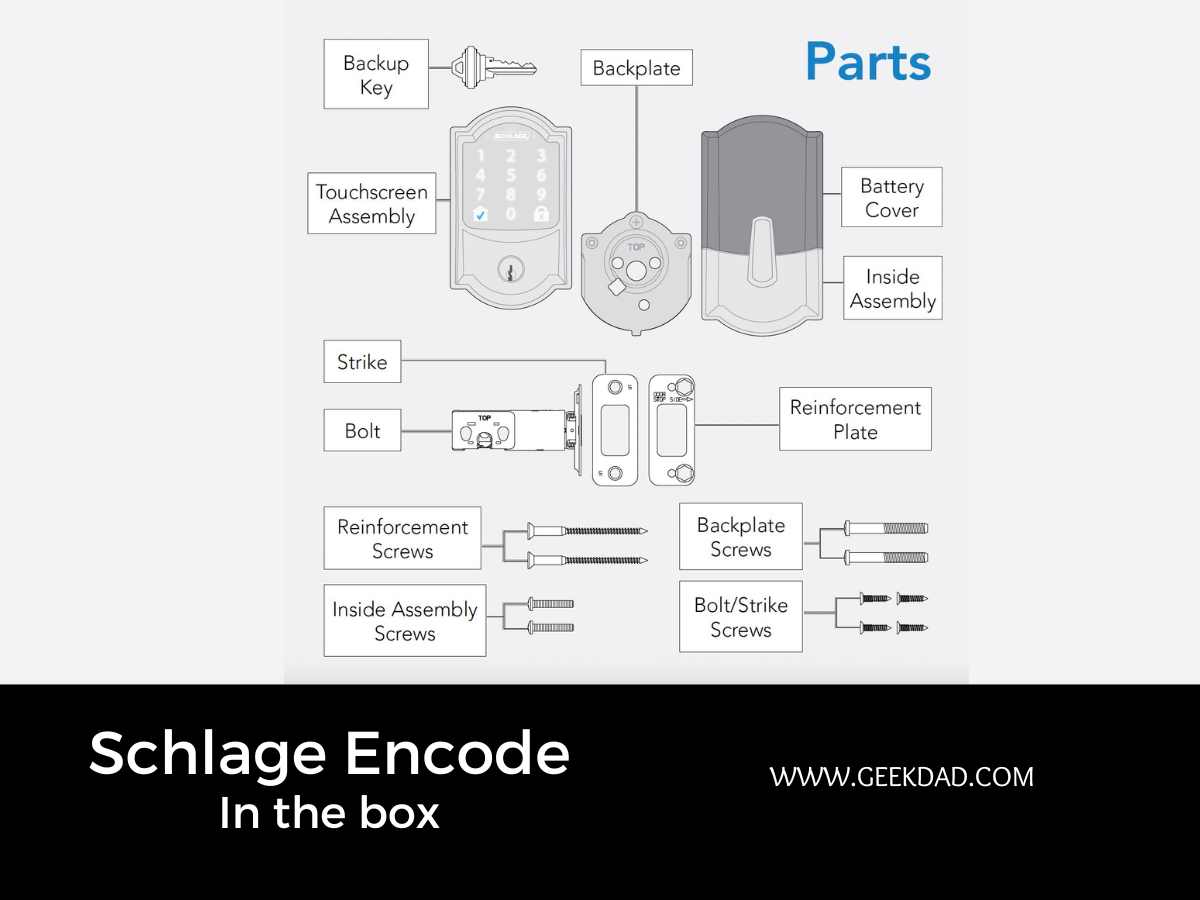
The front faceplate secures the entire assembly using long screws that reach deep into the door structure. Identifying these fasteners is the critical first physical step in the process.
Identify Upper and Lower Fasteners
Most deadbolt-style smart locks utilize two primary screws on the front face.
* Upper screw: Usually longer and recessed deeper within the frame.
* Lower screw: Often shorter but tightened significantly due to years of torque.
Use a Phillips head screwdriver or an electric driver with a magnetic bit to prevent dropping screws into the door cavity.
Lift Front Cap With Care
Remove both screws completely before attempting to separate the faceplate. Gently pull the cap away from the door surface while watching for resistance.
🔍 Visual Cue: Stop immediately if you feel tension. A thin wiring harness likely still connects the cap to the internal motor.
Disconnect Wiring Harness Properly

Separating electronic components requires precision to avoid breaking fragile plastic connectors. This step ensures you can fully remove the front assembly without damaging the lock brain.
Locate the Connector Plug
Find the small plastic plug attaching the internal wiring to the back of the front assembly. These connectors are often white or black micro-plugs secured by a side tab.
Unplug Without Causing Damage
Grip the plastic housing firmly rather than the wires themselves.
1. Press the release tab gently with a flathead screwdriver if present.
2. Pull the connector straight out without twisting or angling it.
3. Feed the wire through the door bore from the exterior side carefully.
✅ Pro Tip: If you plan to reinstall the lock later, leave wires in place and cap ends with electrical tape to prevent accidental shorts.
Remove Back Plate and Handle Assembly
With structural screws and electrical connections gone, you can now detach the remaining hardware from the door spindle.
Locate the Hidden Allen Screw
Flip the lock to the interior side and search for a small hex-shaped screw. This fastener is often hidden inside the handle shaft or covered by a rubber plug. Insert a 3mm or 4mm Allen key and turn counterclockwise until fully removed.
Pull Off Handle and Mounting Bracket
Grasp the interior handle and pull straight off the spindle. Use a Phillips screwdriver to remove any remaining mounting plate or bracket screws. Extract the deadbolt mechanism from the door edge if it has not detached yet.
⏱ Time Estimate: This step typically takes 5–10 minutes once all screws are accessible.
Schlage Encode Special Removal Steps
Schlage Encode models feature unique design elements that require a specific sequence to avoid breaking the glass touchscreen.
Remove Side Casing Screws First
Locate two tiny screws on each side of the faceplate. Use a precision Phillips screwdriver to remove them and place screws in a labeled container immediately.
Detach Front Faceplate Gently
Unscrew the two long front-facing screws after removing the side casings. Lift the metal or glass faceplate straight up without twisting the frame.
Release Keypad Wiring Tab
Find the small tab securing the keypad-to-motor connector. Insert a flathead screwdriver into the slot beside the plug and push the tab outward to release the connection.
❗ Common Mistake: Forcing the faceplate without unplugging the wire causes irreversible internal damage.
Extract Touchscreen Module Safely
Insert a flathead screwdriver into the release slot at the bottom of the module. Apply light upward pressure to slide it out without prying aggressively.
Handle Wing Latch Systems Effectively
Some smart locks from brands like Yale or Kwikset use wing latches instead of visible front screws. These require a specialized approach for removal.
Use Release Tool or Flathead Substitute
Locate the side slots on the lock body. Insert the wide end of the manufacturer’s release tool or a small flathead screwdriver. Slide the tool in to retract the spring-loaded wings simultaneously.
Pull Lock Straight Off Door
Hold the lock body firmly once latches are retracted. Pull directly away from the door without twisting to release the unit from the mounting plate instantly.
Remove Mounting Plate If Necessary
Unscrew the mounting plate with a Phillips head driver if you need full removal for relocation. Keep screws labeled for future use with newer series models.
🔄 Upgrade Tip: Verify compatibility before reinstalling, as newer Series 2 models may require a different plate configuration.
Post-Removal Inspection Checklist

Ensure your door is clean, safe, and ready for the next installation or temporary security measures.
Check for Leftover Components
Verify nothing remains inside the door structure. Use a flashlight to inspect bore holes for stray screws, wires stuck in the edge, or broken plastic fragments.
Inspect Door Surface Condition
Look for stripped screw holes, scratches from tools, or misaligned mounting areas. Fill stripped holes with wooden toothpicks and wood glue if you plan to reinstall hardware later.
Manage Disconnected Wires Safely
Push wires back into the door cleanly if keeping them for a new lock. Cap live ends with wire nuts or electrical tape. Cut wires flush and seal entry points with caulk if abandoning the system entirely.
Organize Hardware for Future Reuse
Smart lock screws vary greatly in length and function. Misplacing them causes significant issues during reinstallation or future upgrades.
Label Each Screw Type Clearly
Sort hardware into a pill bottle or ziplock bag with clear labels.
* Long front screws
* Side casing screws
* Mounting plate screws
* Allen key (include it)
Save Proprietary Release Tools
If your model came with a specific release tool, attach it to your keychain or tape it inside the new battery compartment. Losing this tool makes future maintenance much harder.
✅ Expert Note: Proper organization saves time and prevents frustration when you need to access these components again.
Troubleshoot Stuck Components During Removal
Even with correct procedures, some parts resist removal due to corrosion or overtightening.
Dealing With Stripped Screws
Try placing a rubber band between the screwdriver and screw for extra grip. Use a screw extractor kit for completely stripped heads. Prevent future issues by using the correct bit size and steady pressure.
Freeing Jammed Wiring
Check for kinks inside the door bore if the wire will not pull through. Use compressed air to clear debris blocking the passage. Never yank the wire as this can sever internal conductors.
When Module Won’t Budge
Double-check all screws and connectors if a touchscreen or face module stays stuck. Reapply gentle pressure with the correct tool. Stop immediately if resistance persists to avoid permanent damage.
💡 Pro Insight: Most removal issues stem from overlooked screws or unseated connectors. Retrace each step carefully before applying force.
Prepare Door for New Installation
A clean removal sets the stage for a seamless upgrade to your next security device.
Confirm Compatibility Details
Verify the new model fits existing bore holes before purchasing. Standard sizes are typically 2-1/8 inches for the front and 1 inch for the edge. Check if the mounting plate is interchangeable between models.
Seal Unused Holes Properly
Cover extra holes with decorative plates or wood filler if reverting to a mechanical lock. Sand and paint the area to match your door finish for a professional look.
Test Door Alignment Manually
Operate the door manually to ensure no leftover hardware causes interference. Lubricate the strike plate and hinge pins for smooth function before installing new hardware.
Frequently Asked Questions About Smart Lock Removal
Can I remove a smart lock without special tools?
Most models require only a Phillips screwdriver and an Allen key. Some wing-latch systems need a specific release tool, but a small flathead screwdriver often works as a substitute.
What should I do with the wires after removal?
Push disconnected wires neatly back into the door cavity. Cap any live ends with electrical tape or wire nuts to prevent short circuits if power remains active.
How do I remove a Schlage Encode touchscreen without breaking it?
Remove side screws first, then disconnect the internal wiring tab. Use a flathead screwdriver in the bottom release slot with light upward pressure to slide the module out.
Will removing the lock damage my door?
No, not if you follow proper steps. Remove screws in the correct order, avoid forcing components, and fill any stripped holes before installing new hardware.
How long does it take to remove a smart lock?
The process typically takes 15 to 30 minutes depending on the model. Complex units like Schlage Encode or those with stuck screws may require additional time.
Key Takeaways for Removing Your Smart Lock
Successfully removing a smart lock requires patience, the right tools, and strict adherence to safety protocols. Always disconnect power first, organize your screws by type, and handle wiring harnesses with extreme care to avoid tearing internal connectors.
Whether you are upgrading to a newer model or reverting to a traditional deadbolt, following these specific steps ensures your door remains undamaged. Gather your screwdrivers and Allen keys today to begin your safe and efficient removal process.



