
You have forgotten the combination to your padlock or found an old locker with a stuck code. Panic sets in because you need immediate access without damaging the item. Most standard locks rely on mechanical tolerances that allow you to bypass the code using only touch and tension. You do not need heavy tools or brute force to break a combo lock when you understand these physical weaknesses.
This guide teaches non-destructive methods to open rotary and multi-dial locks in minutes. You will learn to detect subtle resistance changes and isolate correct digits through tactile feedback. We cover techniques for Master Locks, luggage locks, and vintage brass models. Remember to only use these skills on property you own or have explicit permission to open.
Detect Mechanical Resistance to Find Digits

All combination locks use internal wheels that must align perfectly to release the shackle. Applying tension creates friction between these wheels and the lock housing. Correct numbers reduce this friction significantly, creating a “break” you can feel with your fingers. This tactile feedback is the foundation of opening a lock without the code.
Apply Consistent Upward Shackle Tension
Pull the shackle upward firmly to create necessary friction inside the mechanism. Too little tension fails to expose resistance points while too much binds all wheels together. Start with maximum upward pressure for rotary dial locks to begin the process. Maintain a steady outward pull throughout the entire procedure for multi-dial padlocks.
Pro Tip: Use your index finger to pull the shackle while rotating the dial with your other hand. This technique gives you precise control over tension levels.
Identify the Binding Point on the Dial
Turn the dial slowly under tension until one wheel binds first against the housing. Feel for the exact spot where the dial sticks or clicks into a groove during rotation. This binding point is not random but a physical notch interacting with the locking bar.
- On a 40-number dial, the binding point often lands between whole numbers.
- Record the higher of the two surrounding numbers when the dial binds.
- Repeat the process several times to confirm the consistency of the number.
This specific number serves as a primary candidate for the third digit of your combination.
Isolate the Third Digit on Rotary Locks
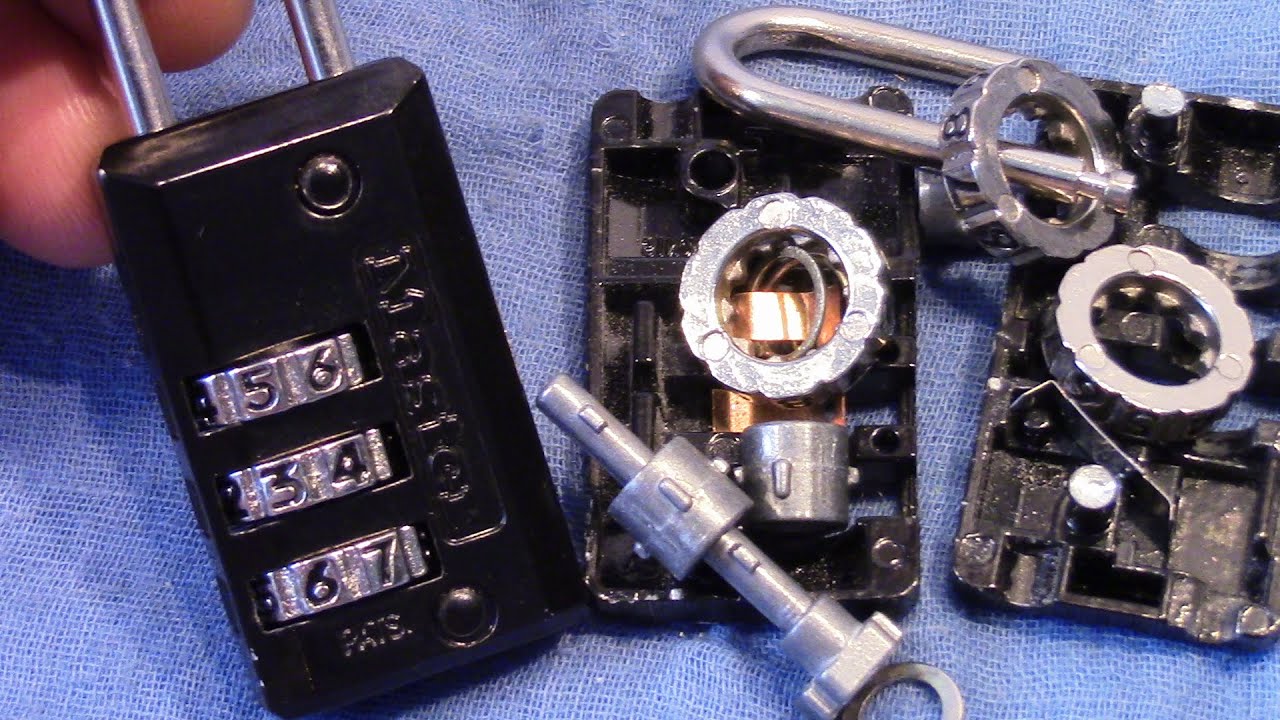
Standard 3-wheel combination locks theoretically have 64,000 possible combinations to try. Manufacturing tolerances allow you to narrow this massive list down to just eight final attempts. You must correctly identify the third digit to make this reduction possible.
Test the Groove Range for Accuracy
Select two potential third-digit candidates from your initial detection phase. Set the dial to the first candidate number and apply full shackle tension immediately. Gently rotate the dial back and forth to measure how far it moves before stopping completely. Repeat this exact process with the second candidate number for comparison.
- Correct digit: Allows a wider range of movement before stopping.
- Incorrect digit: Restricts motion to a very narrow range.
- Decision: The number with the greatest range of motion is the real third digit.
Find the First Digit Using Resistance Feedback
Confirming the third digit allows you to calculate the first digit using resistance from the second wheel. This step relies on specific mechanical feedback unique to the lock design.
Scan for Consistent Drag Points
Reduce your shackle tension to about half of your initial pulling force. Turn the dial slowly clockwise through a full revolution to feel for drag. Look for a specific point where consistent resistance occurs during the rotation. On many Master Lock models, this resistance appears near the 14.5 mark on the dial.
Note: Resistance often appears at half-number intervals due to dial marker width versus internal notch position.
Calculate Possible First Digits
Use the resistance point you found to apply standard offset logic for your specific lock. If resistance is around 14.5, possible first digits include 20, 24, 28, 32, 36, 0, 4, and 8. These numbers follow a plus-4 increment pattern adjusted for the 40-number dial range. Combine this list with your confirmed third digit to generate eight testable combinations.
Execute the Final Eight Attempts
You now have the first digit set and the third digit confirmed with certainty. Only the second digit remains uncertain, yet its options are limited by mechanical design constraints.
Generate and Test Combinations
Create a list of combinations using your known first and third digits. The second digits will follow known offsets or specific tolerances for your lock model. Test each combination in order while maintaining steady tension on the shackle.
- Set the first digit to your calculated value.
- Set the third digit to your confirmed value.
- Cycle through the limited second digit options one by one.
Most users find the correct code within the first three to five tries using this method. Success comes from patience and accurate tactile detection earlier in the process.
Open Multi-Dial Padlocks Quickly
Luggage locks and gym locks use independent rotating dials that are easier to manipulate than rotary models. Each wheel can be tested individually because they do not share a single dial mechanism.
Apply Constant Outward Shackle Pull
Pull the shackle outward firmly and maintain steady pressure without fluctuating. This tension forces internal notches to bind when they are misaligned with the release mechanism. Keep this pressure constant while you manipulate the individual dials.
Rotate Dials to Find the Break Point
Start with the dial that feels the tightest when you wiggle it gently. Turn it slowly from zero to nine while watching for a sudden drop in resistance. Some models show a tiny shackle shift or a click when the correct number aligns. Mark this number immediately as it is likely correct.
Move to the Next Tightest Dial
The binding shifts to the next wheel after you set the first dial correctly. Wiggle each remaining dial to find the one with the most resistance now. Rotate it slowly to detect its specific break point and set it to that number. Continue this process until all but the last dial are set in place.
Cycle the Final Dial to Release
Turn the last dial slowly one number at a time while keeping tension on the shackle. The shackle will pop open instantly when the final notch aligns perfectly.
Pro Tip: Use tape on the shackle to amplify small movements. Even a 1mm shift confirms progress toward the solution.
Crack 3-Dial Locks in Minutes
Three-digit combo locks respond very well to tactile manipulation techniques. You can often solve these in under two minutes with practice.
Follow the Step-by-Step Sequence
Pull the shackle up with firm and constant force throughout the attempt. Rotate the top dial until resistance drops significantly, then set it to that number. Move to the middle dial which now binds tighter and rotate until it feels loose. Turn the bottom dial through each number until the lock pops open completely.
Handle 4-Dial Locks Precisely
Locks with four dials require more sensitivity due to increased mechanical complexity. These often protect briefcases, drawers, or toolboxes and demand careful attention.
Increase Tactile Focus During Rotation
Apply tension and focus intensely on the feel of each dial. Dial one might feel looser at a specific number with slight shackle movement. Dial two could show a clear break in resistance at another spot. Dial three may feel looser with visible shackle wiggle at its correct position. Dial four will stop abruptly or release the lock at the final number.
Warning: Over-tightening tension masks subtle feedback. Use moderate and consistent pull for best results.
Unlock Antique Barrel Locks Safely
Vintage brass locks look complex but follow the same alignment rules as modern versions. All notches must align perfectly for the shackle to release from the body.
Use Gentle Tension on Delicate Mechanisms
Apply light and steady pressure to the shackle to avoid damaging old parts. These locks are often more fragile than modern equivalents and require a gentle touch.
Rotate Barrels Individually for Alignment
Turn each barrel slowly to feel for the exact moment resistance drops. A microscopic shift in the lock body may occur as each barrel aligns. As more barrels align, the entire lock feels looser until perfect alignment releases the shackle.
Expert Note: Misalignment of even 0.5mm prevents opening. Patience is critical for success with antique models.
Avoid Common Mistakes During Attempts
Even skilled users fail when they rush or misapply tension during the process. Avoiding these errors increases your success rate significantly.
Inconsistent Shackle Pressure Causes Errors
Fluctuating tension creates false binds that mislead your detection efforts. Maintain a steady pull throughout the entire procedure to ensure accurate feedback.
Misreading the Groove Location
Always record the higher number when the dial binds between two values. If it binds between 2.5 and 3.5, record 3 as the candidate. If it binds between 8.5 and 9.5, record 9 as the candidate.
Ignoring Movement Range Differences
Do not rely solely on feel without measuring movement range. A difference of 0.3 units can confirm the correct third digit over a false candidate.
Forcing the Dial Rotation
Never force rotation as you will damage the mechanism or mask resistance points. Move slowly and smoothly to preserve the lock integrity.
Know the Limitations of These Methods
Not all locks can be opened using tension and tactile feedback techniques. Some models have specific features designed to prevent this.
Resistant Lock Models Exist
High-security disc locks often resist groove detection and resistance analysis completely. Ball-bearing mechanisms and anti-manipulation plates block tactile feedback effectively. These features make standard breaking techniques ineffective.
Digital Locks Are Immune
Keypad or electronic combo locks do not rely on mechanical wheels for operation. They require different bypass methods that do not involve tension or tactile sensing.
Reset the Combination After Access
You can reprogram most standard locks once you have successfully opened them. Changing the code ensures your item remains secure after recovery.
Standard Reset Procedure Steps
Pull the shackle up and rotate it 90 degrees to enter set mode. Hold it in this position while turning dials to your new desired code. Release the shackle and scramble the dials to lock the new combination in place. Now only the new combination works to open the lock.
Security Tip: Change codes regularly if used for storage or travel to maintain security.
Choose Better Locks for Real Security
Combination locks act as deterrents rather than high-security devices for valuable items. Understanding their limits helps you choose better protection.
Upgrade Recommendations for Safety
Use keyed padlocks with pick-resistant cores for higher security needs. Install disc detainer locks for superior protection against manipulation. Add alarms or sensors for high-value items to deter theft attempts effectively. Assume any standard combo lock can be broken in under five minutes by someone with knowledge.
Frequently Asked Questions About Breaking Combo Locks
Can you break a combo lock without tools?
Yes, you can break a combo lock using only your hands by applying tension and feeling for resistance. The method relies on tactile feedback from internal wheels aligning rather than physical force or external tools.
How long does it take to open a forgotten combination?
Most users can open a standard lock in under five minutes with practice. The process involves detecting resistance points and testing a small number of final combinations.
Will these methods damage my lock?
No, these non-destructive techniques do not damage the lock when performed correctly. You avoid forcing the mechanism by relying on gentle tension and precise movement detection.
Do these tricks work on digital keypad locks?
No, digital locks do not use mechanical wheels or notches for security. These tactile methods only work on mechanical combination locks with physical dials.
What if the lock has anti-manipulation features?
Locks with ball bearings or anti-manipulation plates resist these techniques effectively. You may need professional help or cutting tools for these high-security models.
Key Takeaways for Breaking Your Combo Lock
You now understand how to break a combo lock using tension, resistance detection, and tactile feedback. The process involves identifying binding points, isolating digits, and testing a reduced list of combinations. Always remember to use these skills legally on your own property only.
Start by practicing on an old lock you own to build your tactile sensitivity. Mastering the feel of the binding point is the most critical skill for success. With patience and steady hands, you can recover access to your items quickly and without damage.



