
Your smart lock might fail to recognize your finger not because of your print, but due to dirt blocking the sensor. Learning how to clean a smart lock properly removes grime that causes false rejections and ensures your home stays secure.
This guide details the exact tools you need and the safe steps to restore your device. You will discover how to clear debris from crevices and maintain battery contacts for peak performance.
Essential Cleaning Tools for Safe Smart Lock Maintenance
Gathering the correct supplies prevents accidental damage to sensitive electronic components during the cleaning process. Using harsh chemicals or abrasive materials can scratch the sensor or ruin the outer casing permanently.
Required Supplies List
- Soft microfiber cloth for wiping sensors safely
- Cotton swabs for reaching tight edges
- Isopropyl alcohol with 70% concentration or higher
- Compressed air canister for blowing out dust
- Plastic or wooden toothpick for gentle scraping
- Small soft-bristled brush like a clean toothbrush
Never use: Harsh solvents, abrasive scrubbing pads, excessive water, or metal tools that conduct electricity.
Power Down the Smart Lock Before Cleaning
Disconnecting power is the critical first step to prevent short circuits while you clean internal or external parts. Moisture entering a powered device can cause immediate and irreversible circuit board failure.
Steps to Turn Off Safely
- Remove all batteries from the compartment immediately.
- Disconnect any hardwired power sources if applicable.
- Wait at least 30 seconds to ensure the system fully shuts down.
- Confirm the display is dark and no indicator lights remain active.
⚠️ Warning: Cleaning a powered-on lock risks severe electrical damage if liquid seeps into the housing.
Clean the Fingerprint Sensor to Restore Recognition

The fingerprint reader is the most sensitive component where oil and dirt buildup cause most access failures. A clean sensor ensures fast and accurate identification for all authorized users.
Step-by-Step Sensor Cleaning Process
- Dampen a corner of your microfiber cloth with isopropyl alcohol.
- Wipe the sensor surface gently using small circular motions.
- Use a dry cotton swab to absorb any remaining moisture or residue.
- Apply light pressure with an alcohol-dampened swab for stubborn grime.
- Allow the area to air dry completely for one to two minutes.
✅ Pro Tip: Clean the sensor weekly if multiple people use the lock daily to prevent oil accumulation.
Wipe Down Exterior Surfaces and Keypads
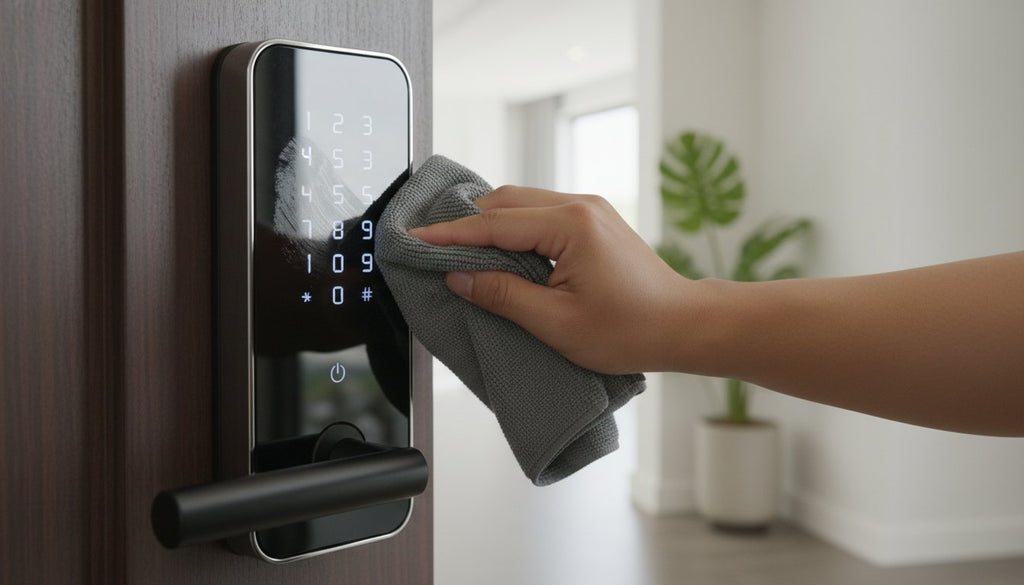
Dust and smudges accumulate on the outer casing and keypad, affecting both the aesthetic appeal and button responsiveness. Regular wiping keeps the device looking new and functioning smoothly.
Cleaning the Outer Casing
- Spray electronics-safe cleaner onto your cloth rather than directly on the lock.
- Wipe all visible surfaces including edges, seams, and button faces.
- Use a dry toothbrush to dislodge dirt from textured or grooved areas.
- Blow compressed air around buttons to remove hidden dust particles.
❌ Avoid soaking seams or openings since moisture can damage internal electronics quickly.
Clear Debris from Keyholes and Crevices
Even keyless models often have emergency keyholes or recessed areas that trap lint and pocket debris. These blockages can prevent mechanical overrides or interfere with sensor accuracy.
How to Clean Tight Spaces
- Use short bursts of compressed air to blow out loose particles.
- Gently scrape stubborn debris using a plastic toothpick only.
- Dab a cotton swab in alcohol to wipe inner edges carefully.
- Never insert metal objects as they can scratch surfaces or short circuits.
✅ Check monthly, especially if the lock is located in dusty or high-traffic environments.
Check and Clean the Battery Compartment

Corroded battery contacts often mimic lock malfunctions by causing unstable power delivery to the system. Cleaning these terminals ensures a strong connection and extends battery life.
Battery Area Maintenance Steps
- Remove batteries carefully and inspect the compartment for corrosion.
- Look for white or green crusty buildup on the metal contacts.
- Scrub the contacts gently with an alcohol-dampened cotton swab.
- Use a dry swab to remove any remaining moisture before reinserting cells.
- Replace with fresh high-quality alkaline or lithium batteries.
🔋 Tip: Avoid using rechargeable batteries unless the manufacturer specifically approves them for your model.
Reassemble and Test the Lock Functions
Reassembling the device correctly and verifying all features ensures your cleaning efforts were successful. Testing every access method confirms the lock is ready for daily security duties.
Final Testing Procedures
- Reinstall batteries or reconnect the power source securely.
- Wait for the lock to boot up and display the home screen.
- Test each function including fingerprint, keypad, and app control.
- Re-enroll fingerprints if the device still shows inconsistent recognition.
🔄 If issues persist: Update the firmware or perform a factory reset per manufacturer instructions.
Prevent Future Buildup with Routine Care
Consistent maintenance prevents most cleaning emergencies and keeps your smart lock responsive year-round. A simple schedule ensures dirt never builds up enough to cause access failures.
Recommended Maintenance Schedule
- Weekly: Wipe the fingerprint sensor and keypad with a dry cloth.
- Monthly: Deep clean crevices and inspect battery contacts for corrosion.
- Seasonally: Re-enroll fingerprints and check for physical weather damage.
🌧️ Outdoor Lock Tip: Install a weather cover if your device is exposed to direct rain or sun.
When to Call a Professional Technician
Some problems extend beyond surface cleaning and require expert diagnosis or component replacement. Knowing when to stop prevents further damage to your security system.
Seek Support If
- The lock fails to operate after a thorough cleaning and battery replacement.
- You see visible damage to internal components or circuit boards.
- Water or significant moisture has entered the main housing.
- Firmware resets do not restore normal function.
📞 Contact the manufacturer or a certified technician rather than attempting internal repairs yourself.
Frequently Asked Questions About Cleaning Smart Locks
Can I use water to clean my smart lock?
No, you should never use water directly on a smart lock as it can seep inside and destroy the electronics. Always use isopropyl alcohol on a cloth or swab instead of spraying liquids directly.
How often should I clean the fingerprint sensor?
You should clean the fingerprint sensor weekly if the lock sees daily use by multiple people. High-traffic areas require more frequent cleaning to remove oil and dirt buildup.
What causes my smart lock to reject my fingerprint suddenly?
Sudden rejection is usually caused by dirt on the sensor, wet fingers, or low battery power rather than a change in your fingerprint. Cleaning the sensor and replacing batteries often solves this issue immediately.
Is it safe to use compressed air on smart locks?
Yes, compressed air is safe and effective for blowing dust out of keyholes and crevices without touching sensitive parts. Ensure you use short bursts to avoid forcing debris deeper into the mechanism.
What should I do if cleaning doesn’t fix the lock?
If cleaning and battery replacement do not work, the issue may be a firmware glitch or hardware failure requiring professional repair. Contact customer support or a certified technician for further diagnosis.
Key Takeaways for Cleaning Your Smart Lock Effectively
Properly maintaining your device involves using the right tools like microfiber cloths and isopropyl alcohol while avoiding water and harsh chemicals. Regular cleaning of the sensor, battery contacts, and crevices prevents most common access failures and extends the life of your lock.
Start your maintenance routine today by gathering your supplies and powering down your device safely. Taking these few minutes to clean your smart lock ensures reliable security and saves you from frustrating lockout situations.



