
Nothing frustrates a homeowner or driver quite like a key that refuses to turn in a stubborn lock. When you face this issue, you might assume the entire unit is broken and needs expensive replacement.
This guide proves that most failures stem from simple issues like debris or worn tabs that you can fix yourself. You will learn specific steps to diagnose, clean, and repair both residential and automotive cylinder locks effectively.
Identify the Specific Lock Failure Symptom
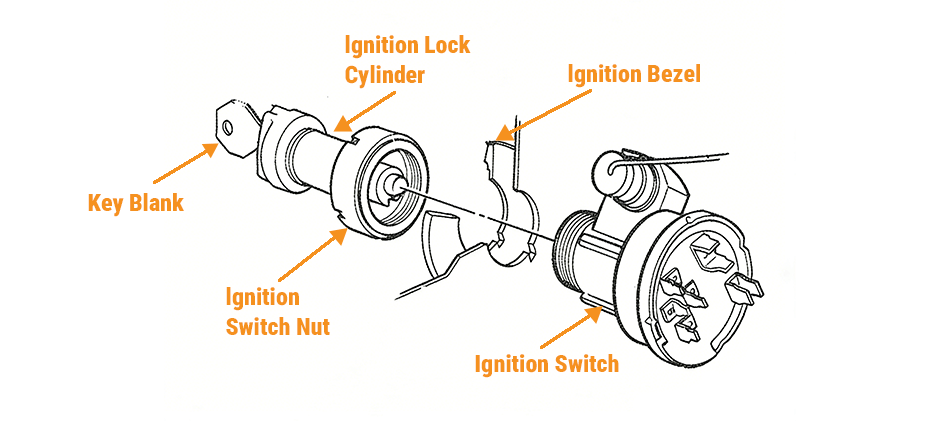
Diagnosing the exact behavior of your lock determines the repair path you must take. Misidentifying the symptom often leads to unnecessary part replacements.
Directional Lock Failure
If the key turns to lock but stops dead when you try to unlock, a sticking tab is likely the cause. This happens when an internal contact point fails to retract during rotation. It drags against the housing wall and prevents the mechanism from completing its cycle.
Excessive Turning Resistance
You are dealing with rotational resistance if you must force the key to turn at all. Common causes include dried lubricant attracting dirt or a bent spring pressing against the sidewall. Metal shavings inside the cylinder can also create significant friction.
Intermittent Key Function
Needing to jiggle the key repeatedly suggests worn or loose internal components. Springs may have lost tension or tabs might be partially broken. In residential doors, loose back plate screws often mimic this symptom.
Complete Key Immobilization
Total failure where the key will not turn in either direction usually indicates a broken fragment jamming the mechanism. Severe corrosion or hardened grime can also block rotation entirely. Do not assume the cylinder is dead before attempting extraction and cleaning.
Loose or Wobbly Cylinder
A lock that feels unstable often has loose invisible screws or a misaligned mounting bracket. This physical play reduces engagement efficiency and mimics deeper mechanical failure. Tightening internal fasteners often resolves the wobble immediately.
Extract the Residential Lock Cylinder Safely
You must remove the cylinder from the door to access the internal components for repair. Follow these precise steps to avoid damaging the housing.
Locate the Release Pin Hole
Find the small pin hole on the side of the cylinder near its base. This aperture is often hidden from casual view but holds the internal locking pin in place.
Use the Right Tool for Disengagement
Insert a straightened paperclip or a small flathead screwdriver into the hole. Apply gentle inward pressure while turning the cylinder slightly with your key inserted.
Feel for the Click and Remove
You will feel a slight click when the internal pin disengages from the housing. Keep pressure on your tool and gently pull the cylinder outward to remove it.
Pro Tip: If the cylinder sticks, wiggle it slightly while maintaining pressure. Forcing it can damage the cam or latch mechanism inside the door.
Inspect and Clean Internal Lock Components
Once extracted, you can open the unit to find the root cause of the failure. Visual inspection reveals wear that external testing cannot show.
Remove the Back Plate
Flip the cylinder to find two invisible screws securing the back plate. Use a precision screwdriver to remove these flush-mounted fasteners carefully.
Expose the Mechanism
Lift off the back plate to reveal the latch, spring, and cam assembly. These three parts drive the motion of your lock and require close inspection.
Check for Common Wear Signs
Look for dust buildup in the chamber or bent springs that have lost tension. Inspect the latch for cracks and ensure the cam is not misaligned. Even minor warping can cause the binding you experienced earlier.
Clean Without Lubricants
Use a dry cloth or soft brush to clear all particles from the chamber. Do not apply oil yet because grease attracts dirt and creates a grinding paste over time.
Replace Worn Springs or Latch
Swap in OEM-compatible parts if springs have lost tension or the latch is damaged. Keeping spare springs on hand allows for quick fixes during future maintenance.
Reassemble and Test the Residential Lock
Reassembly requires precision to ensure the lock functions smoothly after repair. Rushing this step often leads to recurring issues.
Reattach the Back Plate
Slide the plate back over the mechanism and secure it with the invisible screws. Tighten them just until firm since over-tightening warps the housing.
Reinsert the Cylinder
Slide the cylinder back into the door lock body carefully. Ensure it seats fully and aligns with the latch path before testing.
Test Before Finalizing
Insert the key and rotate it to verify smooth operation. Check that the latch retracts fully and engages the strike plate cleanly.
Adjust the Strike Plate
Loosen the strike plate screws on the door frame if the door does not close smoothly. Shifting the plate slightly often solves lingering latch alignment issues.
Diagnose Automotive Lock Tab Failures
Car lock cylinders rely on five metal tabs that compress when you insert the correct key. Failure of even one tab can bind the entire system.
Why Tabs Cause Binding
Each tab must retract fully to clear the cylinder housing during rotation. If one sticks or breaks, it drags against the sidewall and stops movement. This binding often feels like the key is frozen in one direction.
Identify the Sticking Tab
Insert the key and attempt to turn it to find the binding point. If it binds in the unlock direction, the tallest tab is likely the culprit. This specific tab often fails to compress enough to clear the housing.
Fix a Sticking Tab with Precision Filing
You can restore smooth rotation to a binding cylinder by filing the offending tab. This repair saves the cost of a full replacement.
Use a Dremel or Fine File
Secure the cylinder and isolate the sticking tab before beginning work. You will only modify the side that contacts the housing during unlocking.
File the Unlock Slope Only
Create a slight angle on the trailing edge of the tab where it drags. Do not file the front locking side as this weakens the security of the mechanism.
Test Frequently During Filing
Rotate the cylinder every few strokes to check progress. Stop immediately once it turns freely to avoid removing too much material.
Expert Note: Remove less than 0.5mm of material. Precision beats aggression when modifying internal lock components.
Remove Broken Tab Fragments
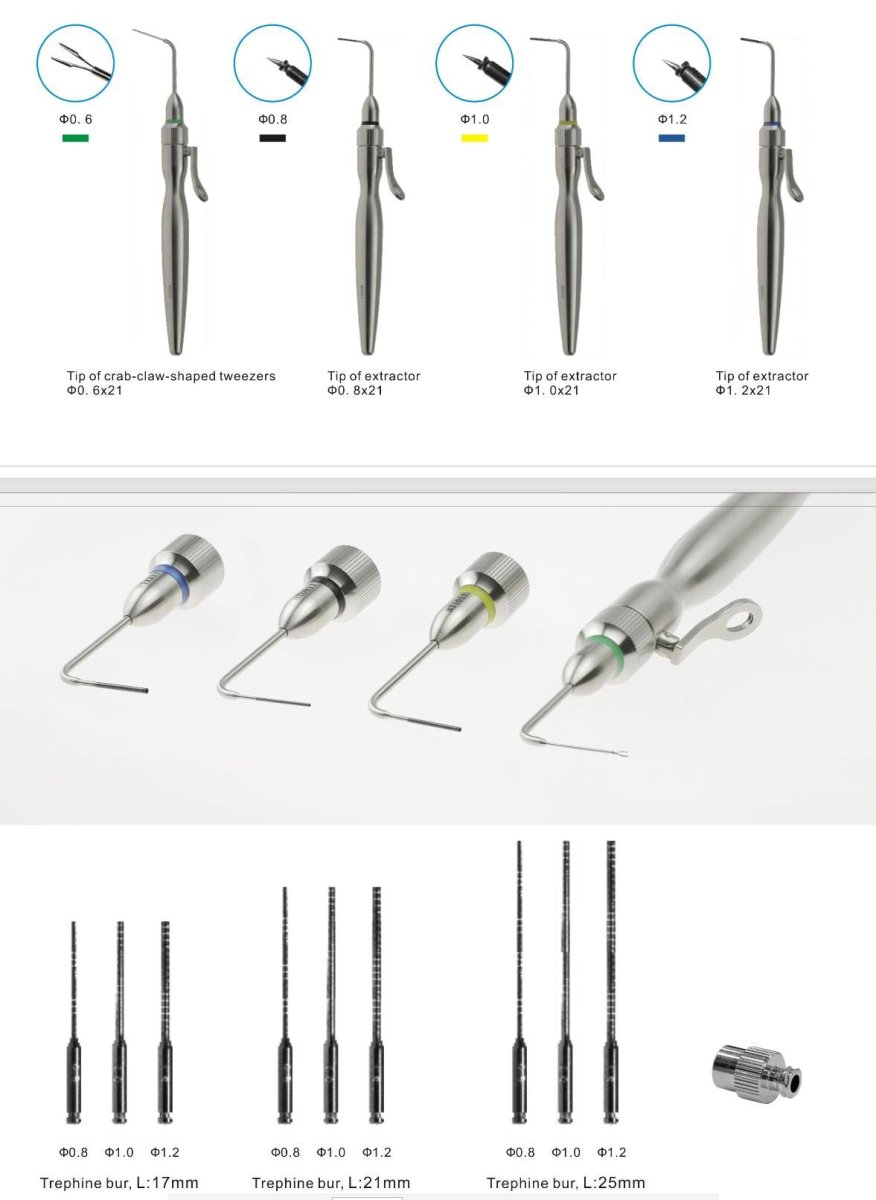
A snapped tab can jam the cylinder completely, but the lock may still work with four tabs. Removing the fragment restores function.
Extract the Fragment
Use a fine pick or dental tool to probe and dislodge the broken piece. Gently wiggle the fragment until it comes free from the housing.
Tap to Loosen Debris
Tap the housing lightly with a screwdriver handle if the fragment is stuck. Vibration often frees lodged metal pieces that picks cannot reach.
Smooth the Break Point
Use a Dremel to round off sharp edges where the tab broke. This prevents future snagging and ensures smooth operation of remaining tabs.
Clean Thoroughly
Blow out or brush away all metal shavings from the interior. Leftover debris causes rapid re-clogging and new binding issues.
Good News: Most automotive cylinders operate reliably with only four functional tabs. You do not need all five for the lock to work.
Reinstall and Lubricate Correctly

Proper lubrication is critical for long-term performance after repair. Using the wrong product causes more harm than good.
Reinsert the Cylinder
Place the repaired cylinder back into the door assembly and reconnect the linkage rod. Ensure all connections are secure before testing.
Test Multiple Cycles
Turn the key 10 to 15 times to confirm smooth lock and unlock action. Listen for any grinding sounds that indicate remaining debris.
Apply the Right Lubricant
Use a light spray of silicone or dry graphite for best results. These lubricants will not attract dirt or degrade rubber seals inside the lock.
Warning: Never use WD-40 in locks. It dries out seals and mixes with dust to form abrasive sludge that ruins mechanisms.
Avoid Over-Lubrication
One short burst of lubricant is enough for proper function. Excess lubricant traps grime and causes problems within months of application.
Prevent Future Lock Failures
Regular maintenance extends the life of your locks dramatically and prevents emergency situations. Simple habits keep mechanisms running smoothly.
Clean Annually
Remove and inspect residential cylinders once a year for best results. Clear dust buildup and check spring tension during this maintenance window.
Use Dry Lubricants Only
Stick to graphite powder, silicone spray, or PTFE-based dry lubes. These keep internals slick without attracting debris from the environment.
Never Use WD-40 or Oil
WD-40 is not a lubricant for locks and acts as a solvent. Long-term use guarantees repeat failures by drying out internal seals.
Keep Spare Parts Handy
Store extra springs, latches, and precision screws for emergencies. Having replacements avoids delays when you discover worn components.
When to Replace the Cylinder
Repair is not always possible if the damage is too severe. You should replace the unit if the housing is cracked or multiple tabs are missing. Replace the cylinder if the key turns but does not engage the latch after cleaning. Consider replacement only if repair attempts fail after thorough adjustment.
Frequently Asked Questions About Cylinder Lock Repair
Can I fix a lock cylinder without replacing it?
Yes, over 80% of cylinder failures can be fixed by cleaning debris, adjusting tabs, or replacing small internal springs. Complete replacement is rarely necessary unless the housing itself is cracked.
Why does my key turn to lock but not unlock?
This directional failure usually indicates a sticking tab inside the cylinder. The tab fails to retract during counterclockwise rotation and drags against the housing wall.
Is WD-40 safe for cleaning door locks?
No, WD-40 is a solvent that dries out rubber seals and attracts dirt. You should use dry graphite or silicone spray instead for safe and effective lubrication.
How many tabs does an automotive lock need to work?
Most automotive cylinders function reliably with only four of the original five tabs. A single broken tab can be removed to restore operation without replacement.
What causes a lock cylinder to feel loose or wobbly?
Loose invisible screws on the back plate or a misaligned mounting bracket typically cause wobbling. Tightening these internal fasteners usually stabilizes the cylinder.
How do I remove a residential lock cylinder?
Locate the small release pin hole on the side, insert a paperclip, and apply pressure while turning the key. The cylinder will click and slide out once the pin disengages.
Key Takeaways for Successful Cylinder Lock Repair
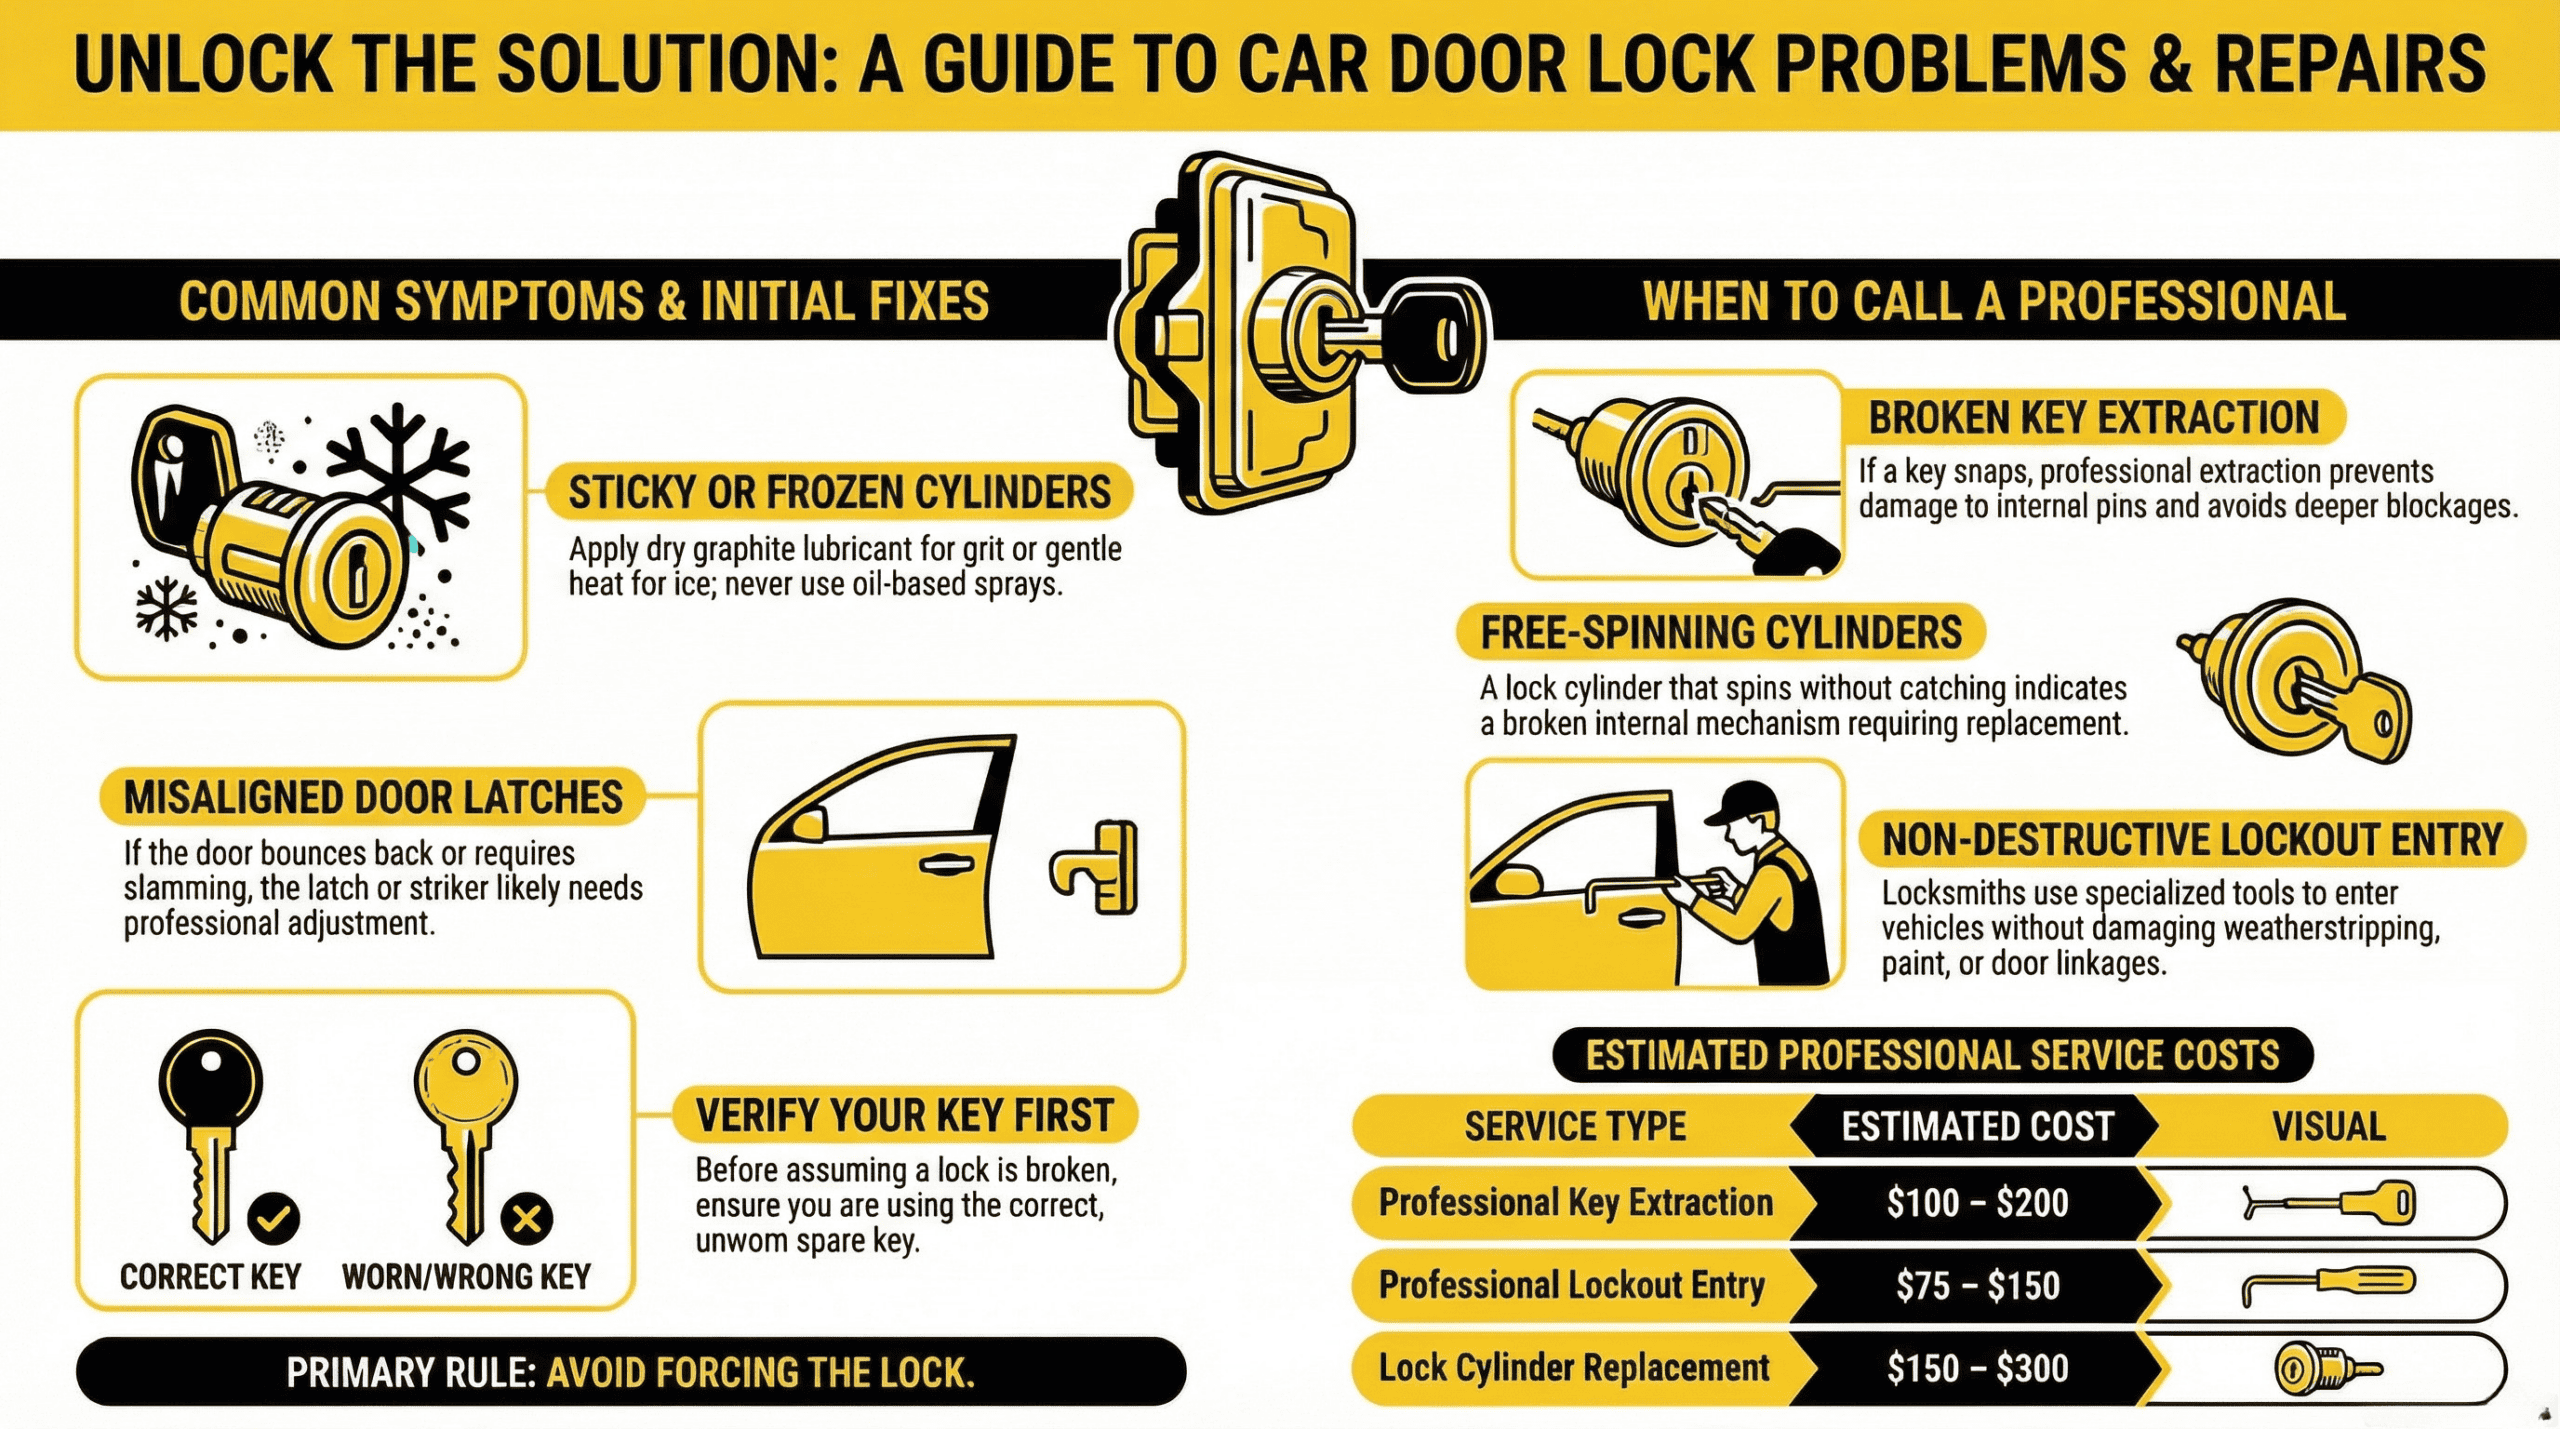
Most lock problems stem from dirt, worn tabs, or misaligned springs rather than total unit failure. You can save significant money by diagnosing the specific symptom and applying the correct mechanical fix.
Remember that cleanliness and proper lubrication are the most critical factors for long-term success. Avoid penetrating oils like WD-40 and stick to dry lubricants to prevent future binding.
Start your repair by identifying whether the issue is directional resistance or total immobilization. With the right tools and patience, you can restore smooth operation to both residential and automotive locks today.



